Fuel cards
The Fuel cards module helps manage fuel expenses. Using this module, you can:
-
Add and manage fuel cards
-
View all transactions for the cards and analyze the accuracy of the operations
-
Set up notifications for charges
-
Upload transaction data automatically or manually

It consists of three tabs:
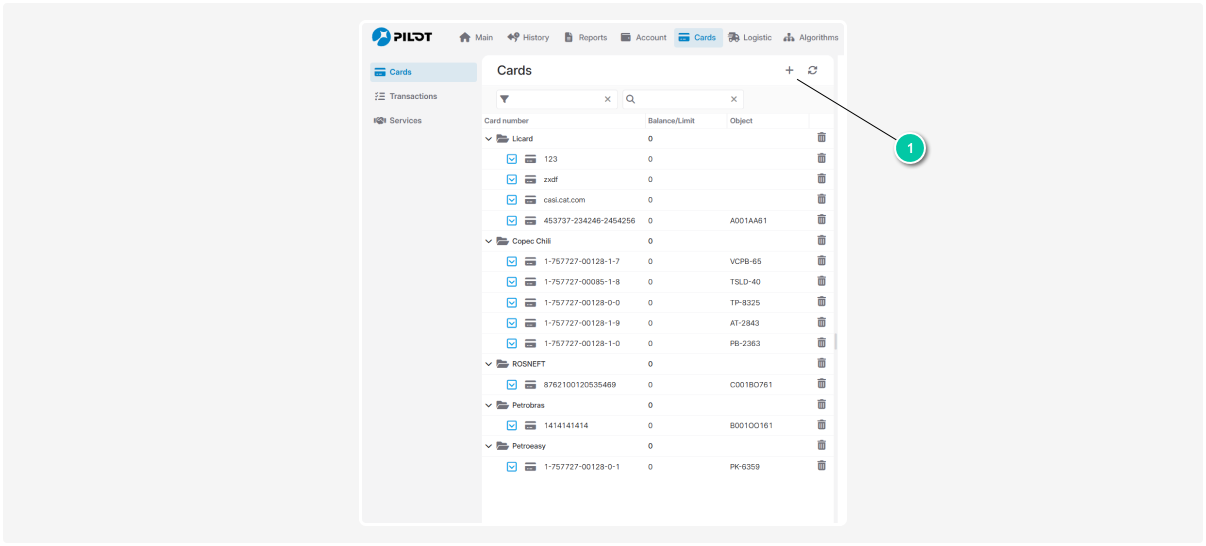
In this section, you can add and view fuel cards.
How to add a card
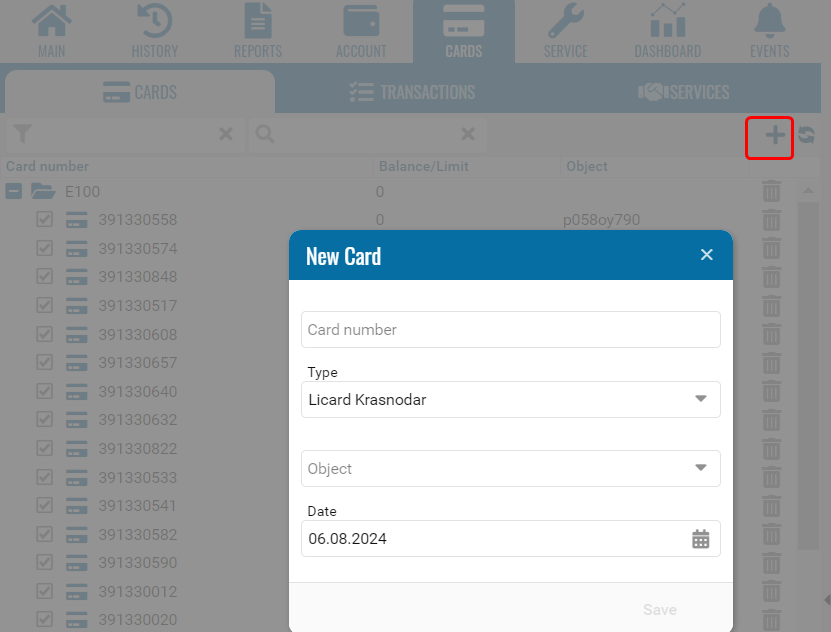
1. Click Add card to add a fuel card
2. In the new window:
-
Enter the card number
-
Select the type of gas station network (fuel network)
-
Specify the object to which the card will be linked
-
Check the default "Date Added" (it’s automatically set, but you can change it if necessary)3. Click Save
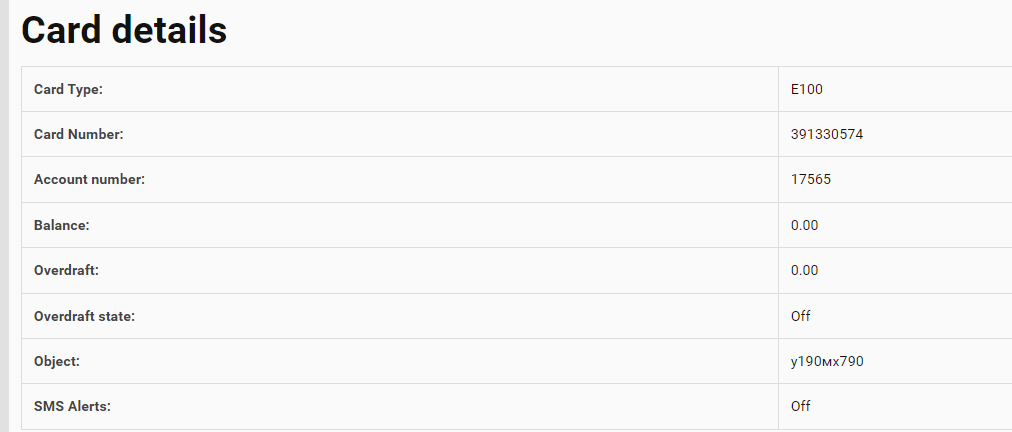
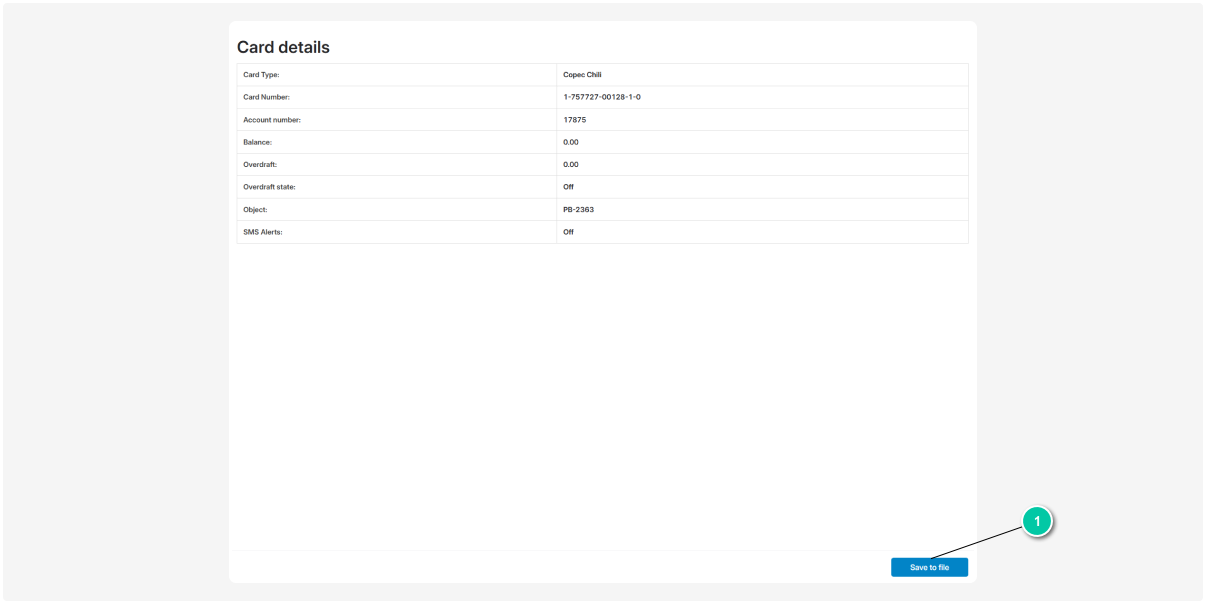
After saving, you will be able to view the details of the fuel card. To do this, right-click and double-click on the card in the list. The card details will appear on the right side of the screen.
You can also save the card’s information in a PDF format by clicking the Save to file button.
This section displays all transactions made with fuel cards.
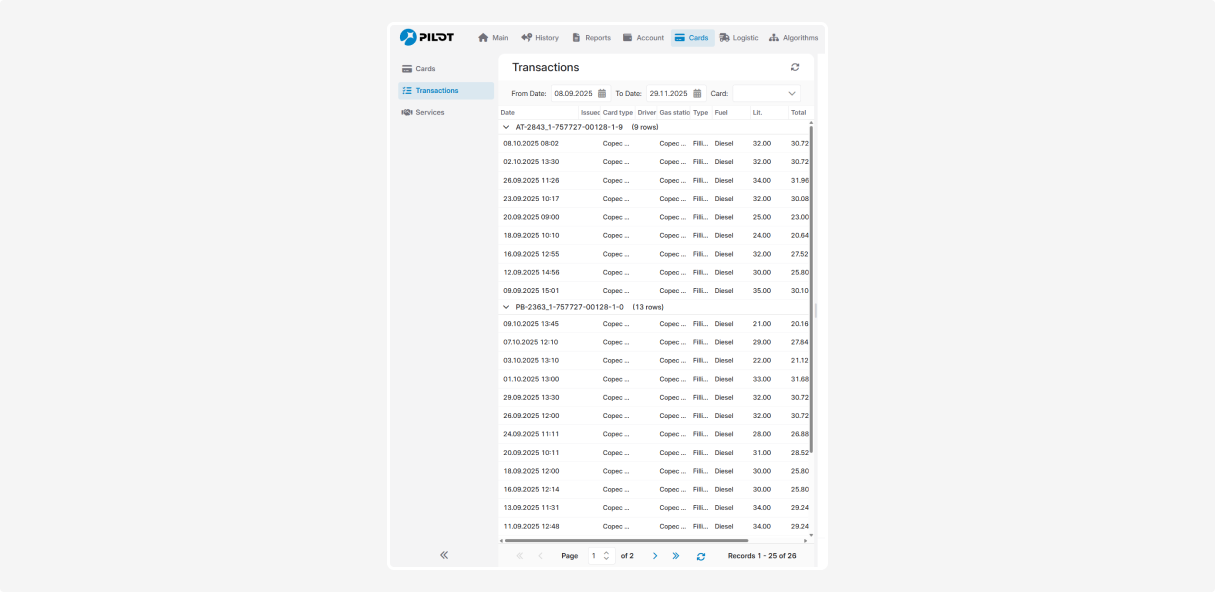
How to find the desired transactions
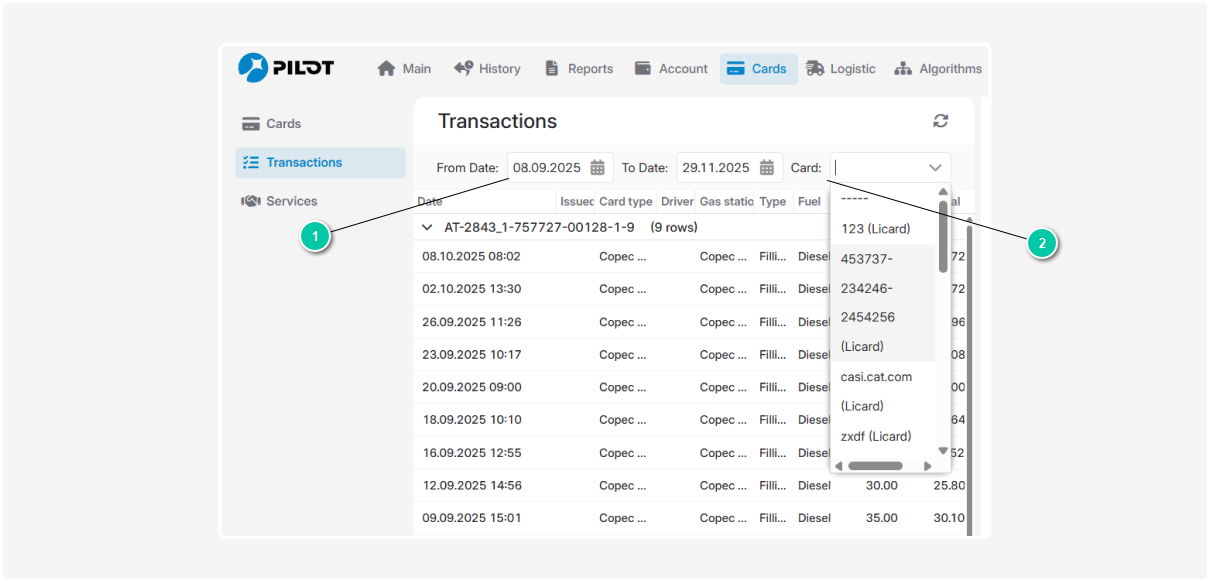
1. Specify the period for which you want to view the transactions
2. Select the desired card
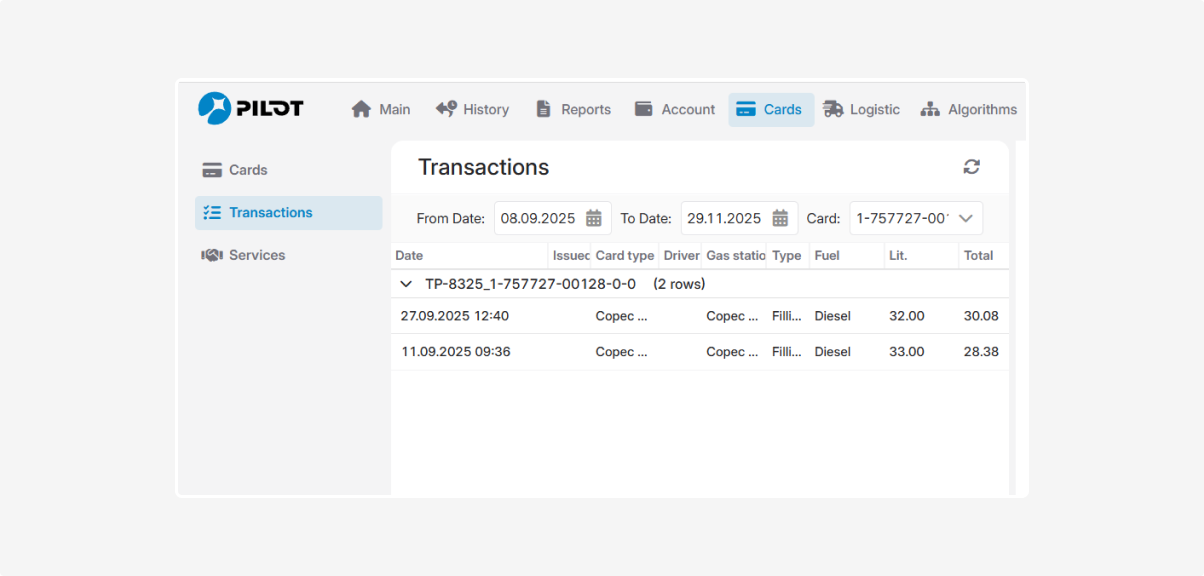
3. After selecting the parameters, all transactions for the selected card will be displayed
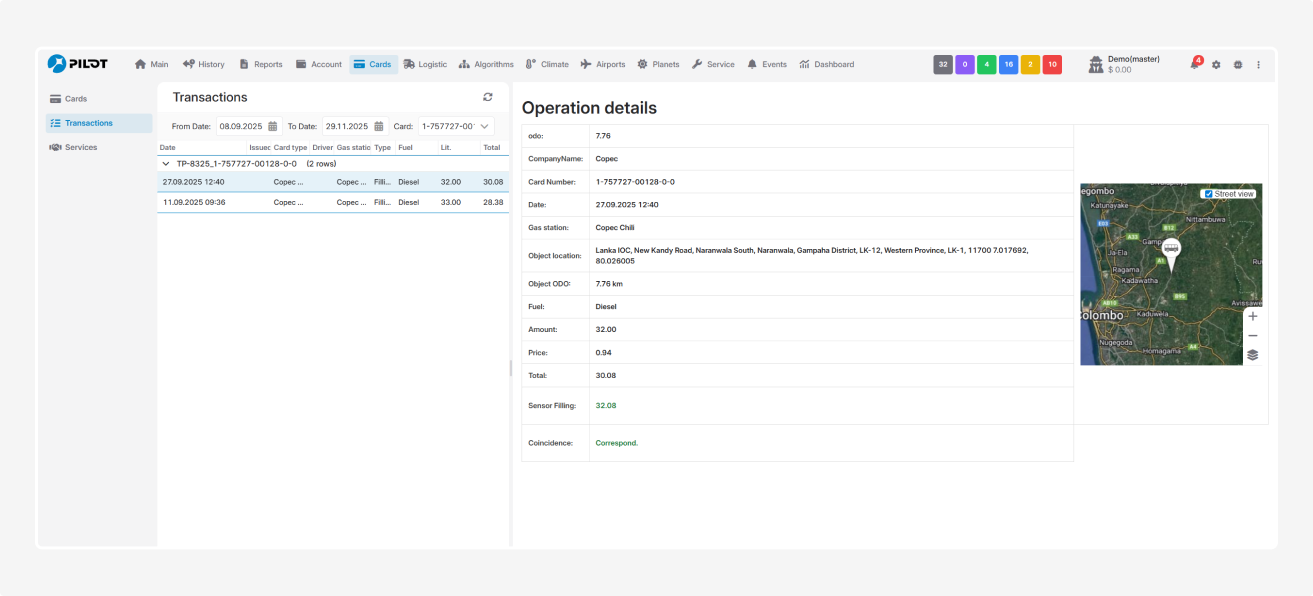
How to view a specific transaction
To view a specific transaction, right-click and double-click on the transaction in the list. The transaction details will appear on the right side of the screen.
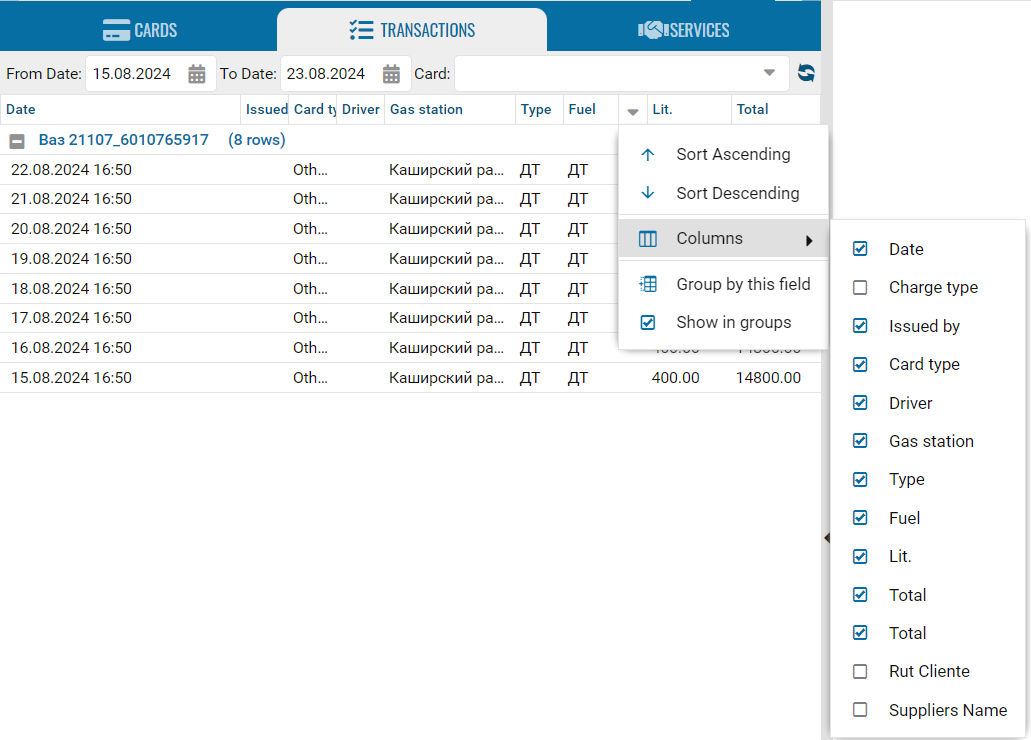
Customizing columns in the transaction List
While working with the transaction list, you can customize the columns in the table.
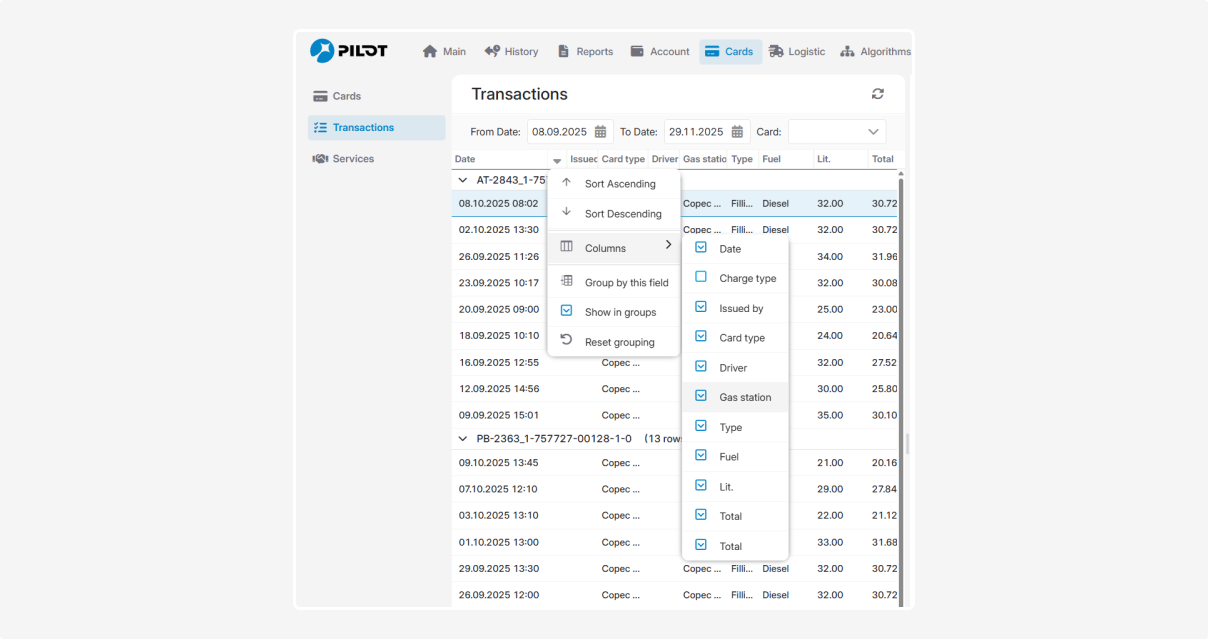
1. Opening the Column settings
In the column header, click the arrow  to open a menu where you can:
-
Sort data in ascending or descending order
-
Select which columns to display
-
Group records by a specific parameter
-
Enable grouping view2. Selecting columns to displayTo configure which data is shown in the table:1. Click Columns to open a list of all available parameters2. Check the boxes next to the columns you want to display
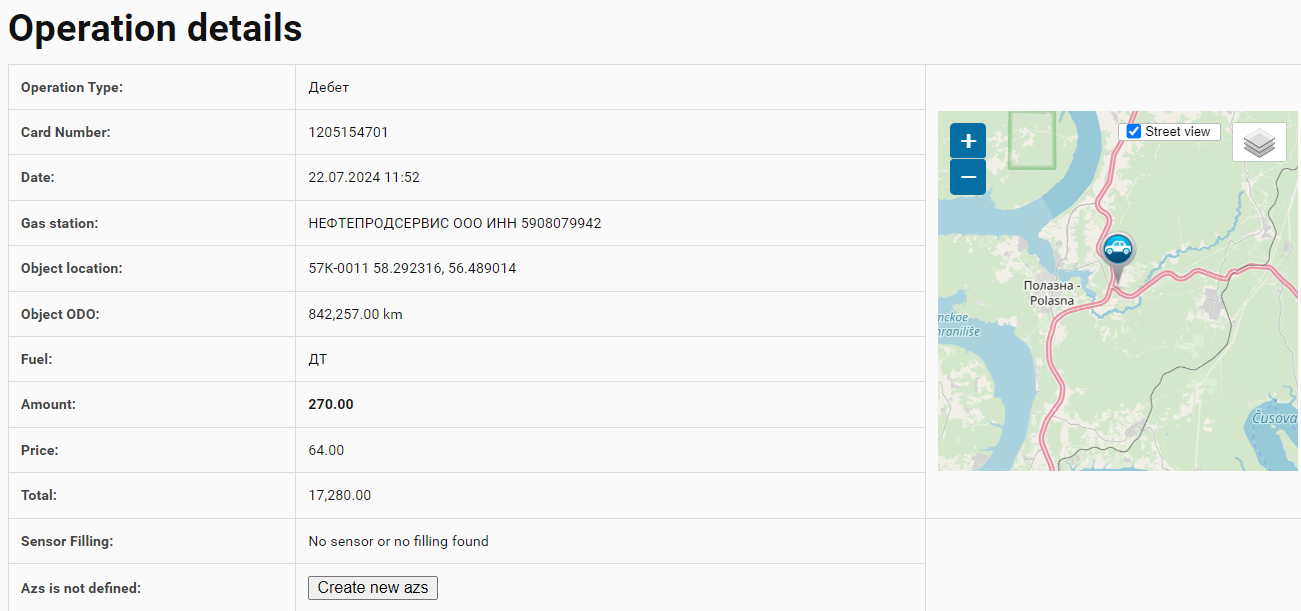
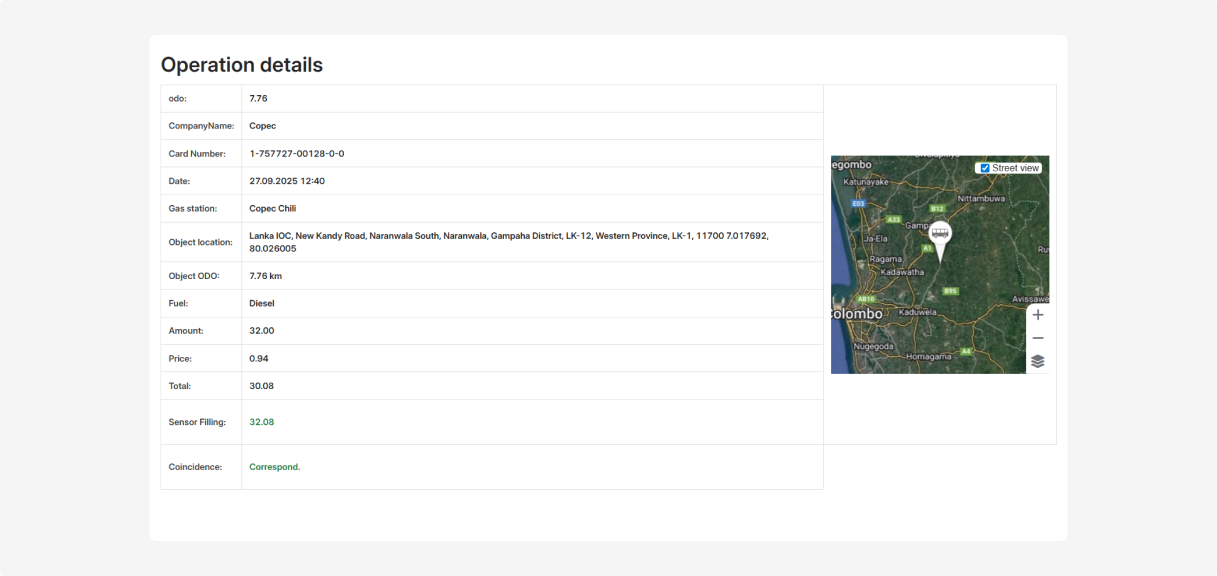
Pay attention to the Gas station column. This column helps you verify whether the actual location of the vehicle matches the coordinates of the refueling station. This allows you to quickly check the accuracy of each transaction. The match is determined within a radius of ±100 meters.
|
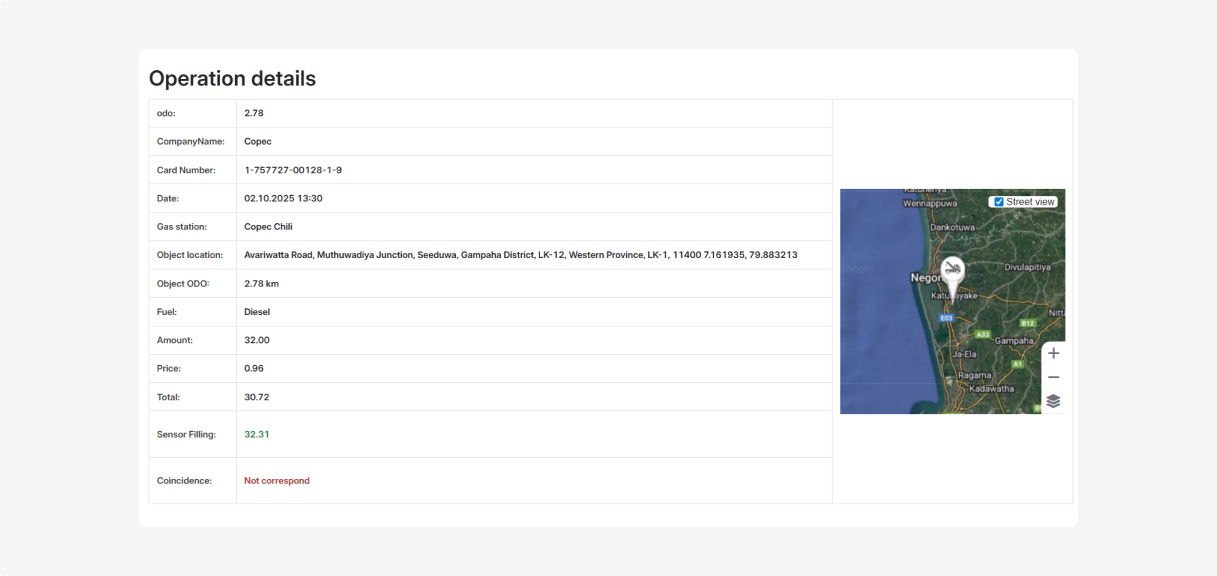
Coordinate matches are highlighted in color and displayed as a separate entry in the transaction details.
-
Green: The vehicle’s coordinates match the gas station’s coordinates
-
Red: No match; possibly the point does not correspond to a refuel
If the card is not linked to a vehicle, location data cannot be determined. In this case, the system will notify you that the card is not linked to an object.
|
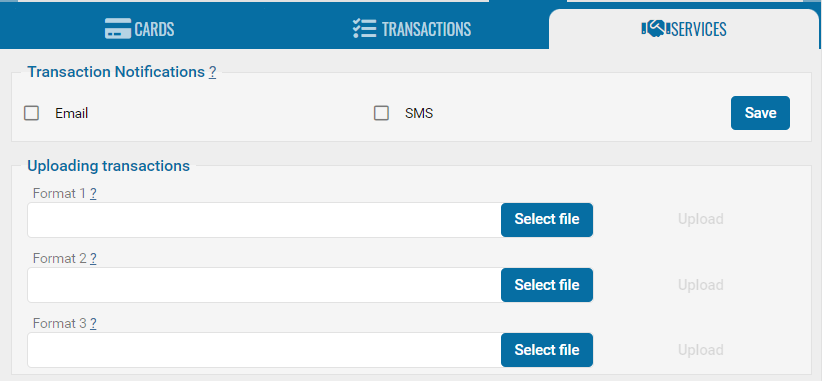
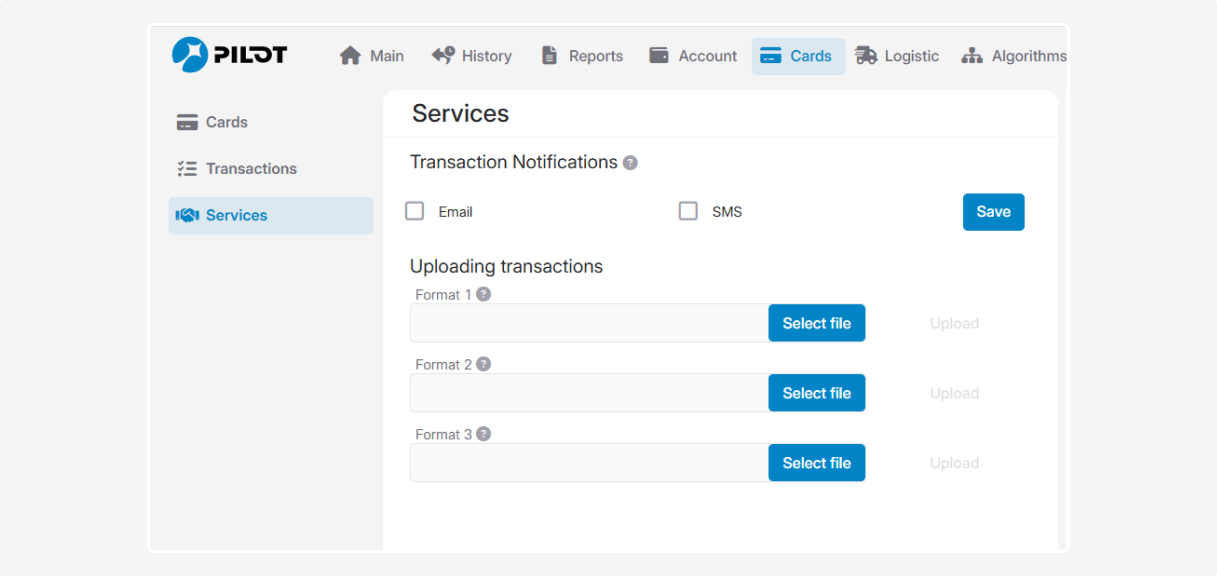
In this section, you can enable or disable transaction notifications and manually upload fuel card transaction data.
How to manage notifications
1. In the Transaction notifications section, check or uncheck the box for the desired type of notification. Available notification options include Email and SMS
If you plan to receive SMS notifications, make sure your SMS package is activated and paid.
|
2. Click Save
Notifications will only be sent for transactions that are automatically uploaded. No notifications are sent for manually uploaded transactions.
|
How to upload transactions manually
1. In the Transaction upload section, select the required file format
2. Click Select file
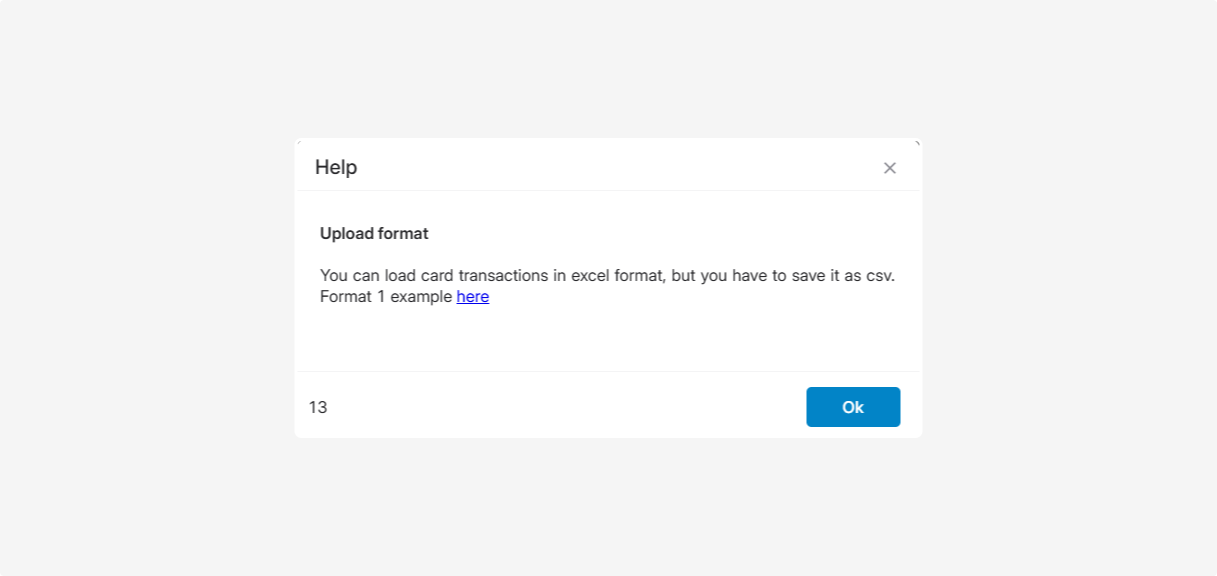
If the transactions are exported from the operator in Excel format, first save the file as CSV.
When preparing the file, make sure:
-
The format is CSV
-
The delimiter is a comma
-
The file structure matches the chosen upload format3. To view a sample file, click the icon
 next to the desired format
4. Click Upload to import the data
