How to work with sections
At the top of the screen, you’ll find the main sections of the portal:
-
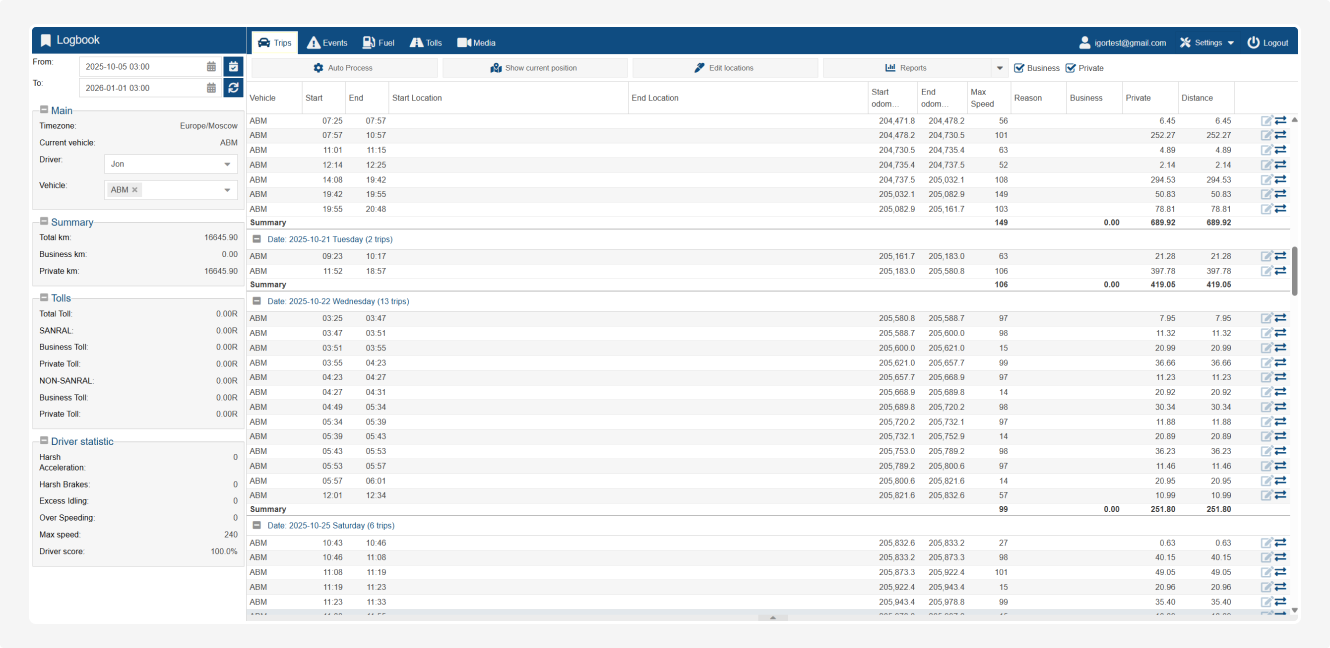
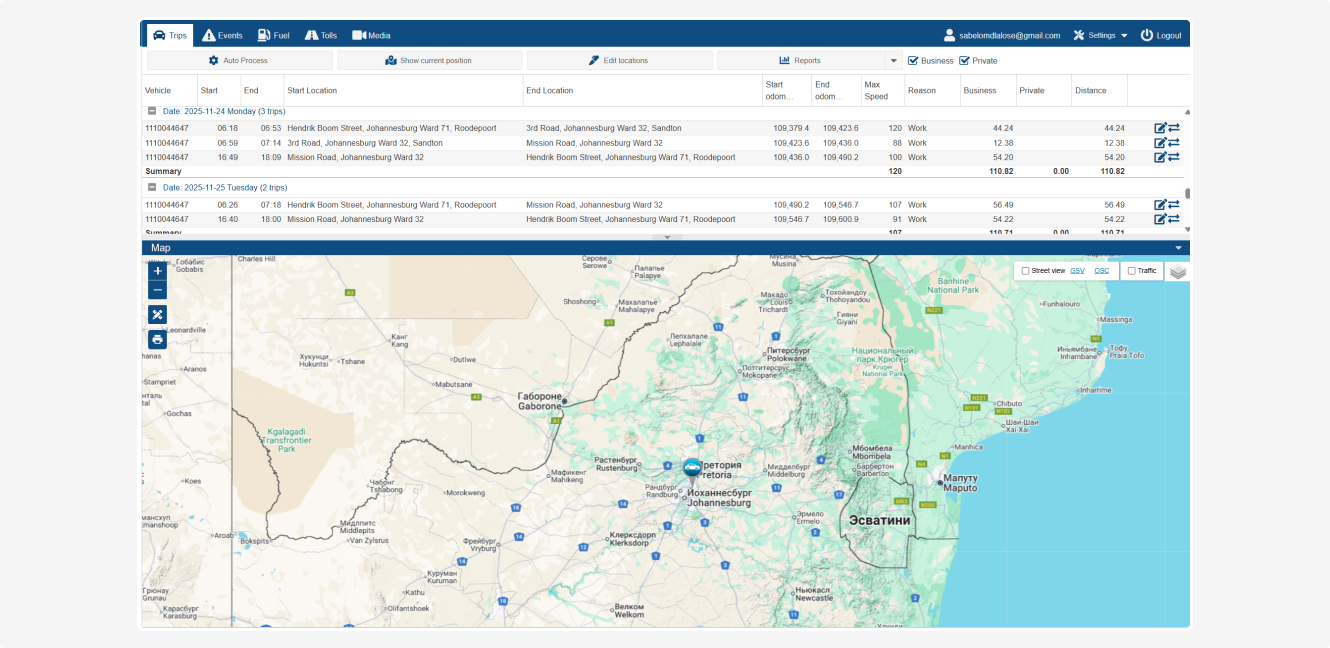
Trips – a list of all trips for the selected period
-
Events – individual driving events
-
Fuel – data on fuel fill-ups and consumption
-
Tolls – detailed information about each toll road
-
Media – photos or videos related to trips
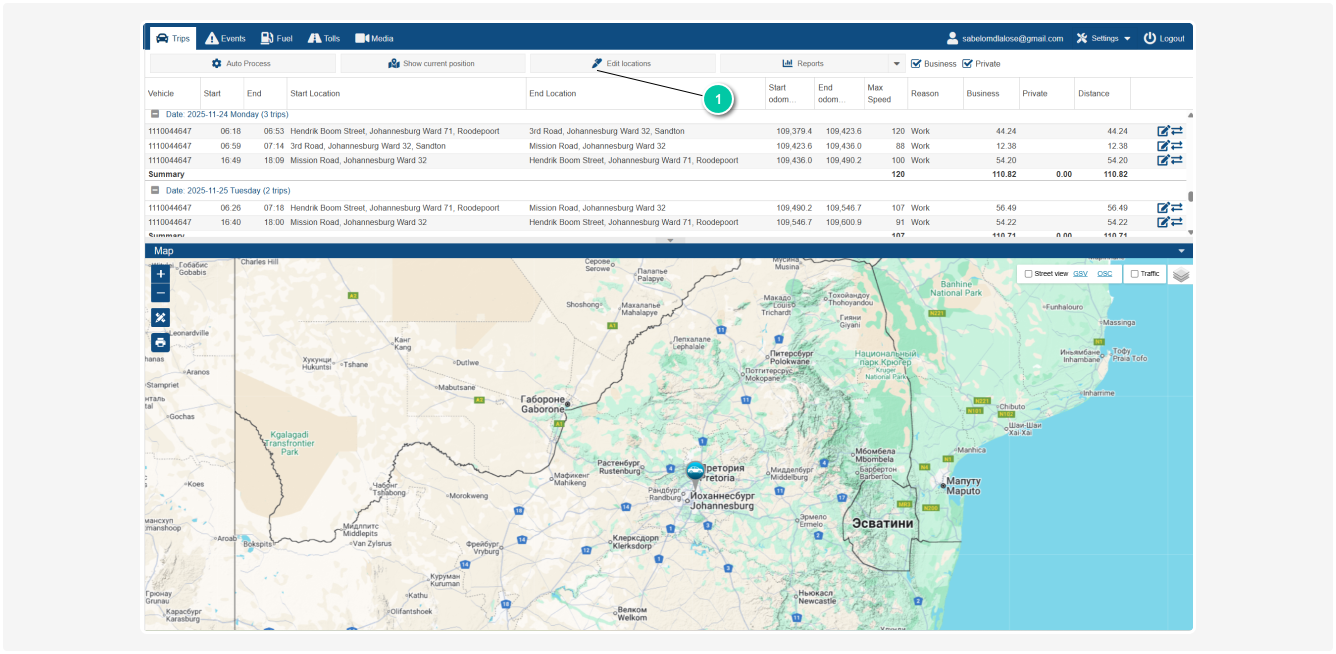
The Trips section displays all the trips made by the driver.
Functions in the Trips section:
Auto processing of trips
The Auto Process function helps automatically classify trips as business or private.
Here’s how to set it up:
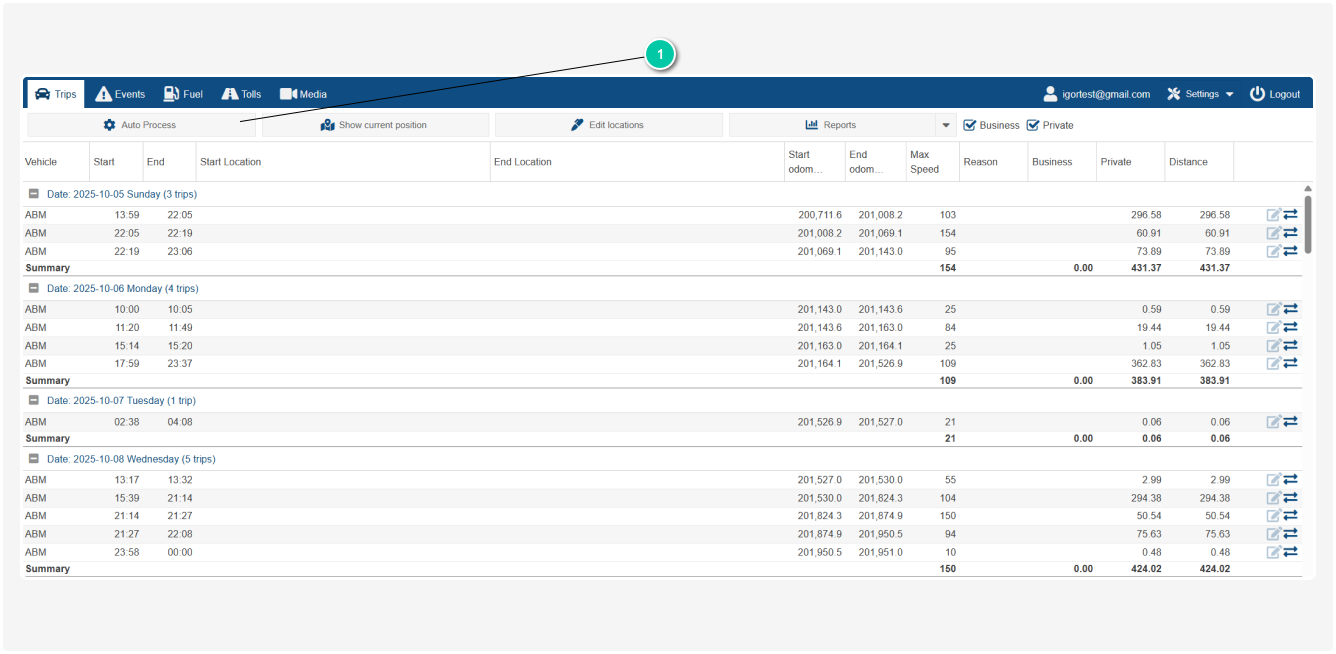
1. Click Auto Process in the Trips section
2. In the window that appears, select the period for which you want to apply auto-processing:
-
Current Month – the system will automatically process trips for the current calendar month
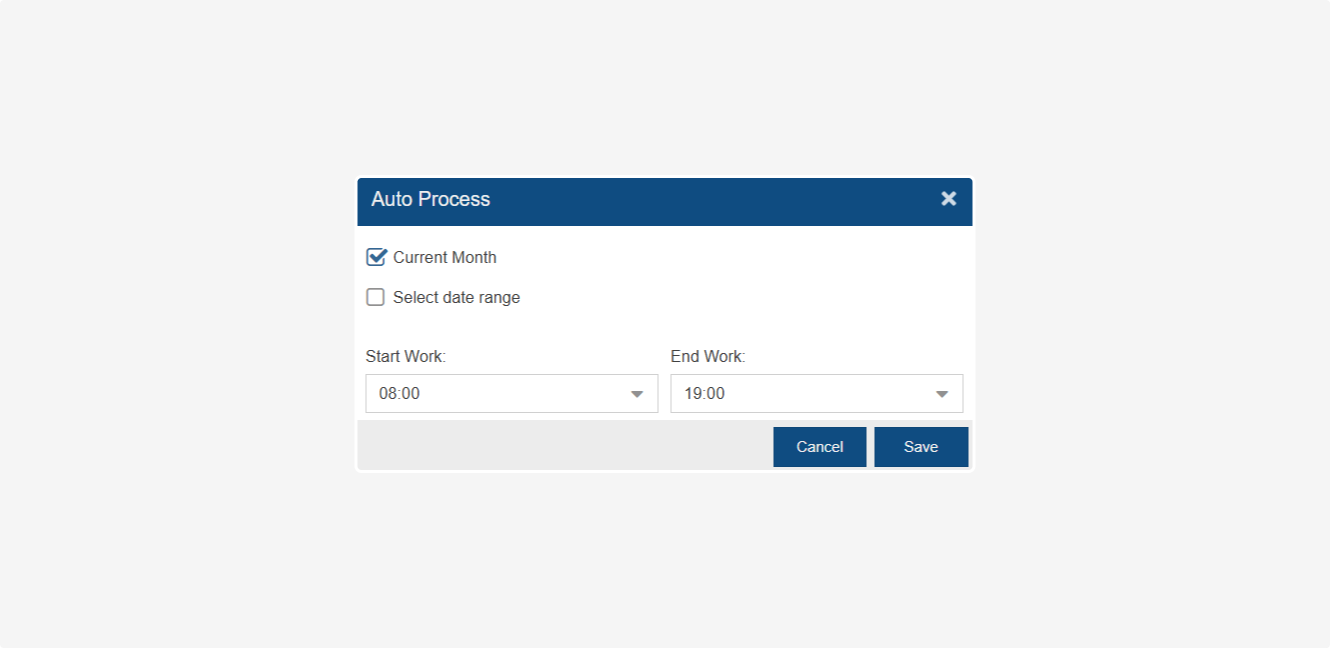
-
Select Date Range – if you want to process trips for a specific period, select the dates using the calendar
Enter:
-
Start Date – From which date to start auto-processing.
-
End Date – Until which date the processing should apply.3. Specify the standard working hours:
-
Start Work – The time after which trips will be considered business trips (e.g., 08:00).
-
End Work – The time after which trips will be considered private (e.g., 19:00).All trips occurring between Start Work and End Work will be automatically classified as Business.Trips before Start Work, after End Work, and on weekends (if configured) will be automatically classified as Private.4. Once all settings are specified, click Save to apply auto-processing.
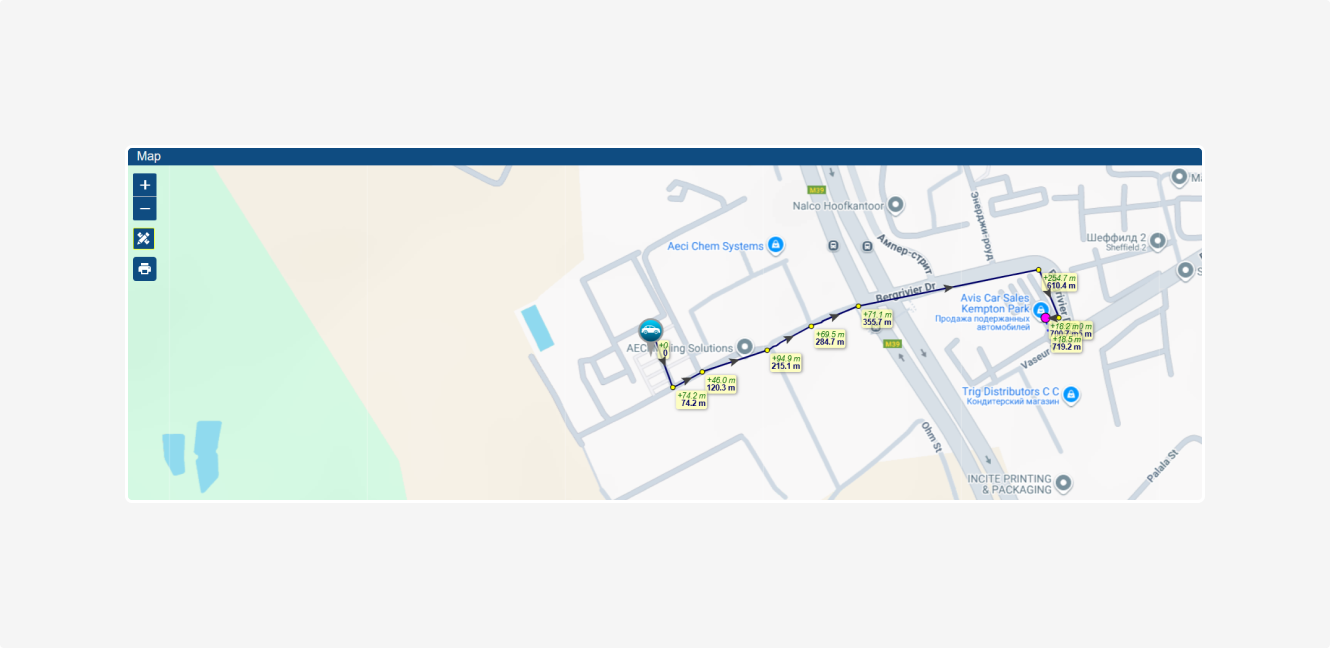
Current position of the object
The Show current position function displays the real-time location of the object on the map.
You can use the following tools to adjust the map:
Zooming In and Out
1. Use  and
and  buttons at the top left of the map. The point in the center will stay in place as you zoom.
2. Use the mouse scroll wheel: scroll away from you to zoom in, and towards you to zoom out. The cursor shows what area you're focusing on.
3. Double-Click: double-click on any point on the map to zoom in.
Printing the map
You can print the current map view. When you click the Print button  , you’ll be presented with four printing orientation options:
-
Landscape – For horizontal maps, suitable for displaying extended areas or objects arranged horizontally.
-
Portrait – For vertical maps, best for areas stretched vertically.
-
Auto – The system will automatically select the optimal print orientation based on the current map view.
-
Custom area – Choose this option to print a specific part of the map. Select the desired area with your mouse, and it will be printed.
Measuring distance between points
This tool helps calculate distances between any two points on the map.
How to use:
1. Click on the map to mark the first point
2. Click again to mark the second point
3. A line will appear between the points, showing the distance
If you need to measure multiple segments, continue clicking on the map to add new points. The length of each segment will be displayed next to it.
Street view
The Street view function allows you to see panoramic photos of the area.
Available view options:
-
GSV – High-quality panoramic images from Google with wide coverage
-
OSC – Community-generated panoramas, which may contain fresher images in some areas
To enable street view:
1. Check the box in the upper-right corner of the map for this option
2. Drag the yellow person icon on the map to the desired location
3. Choose the preferred view option – GSV or OSC
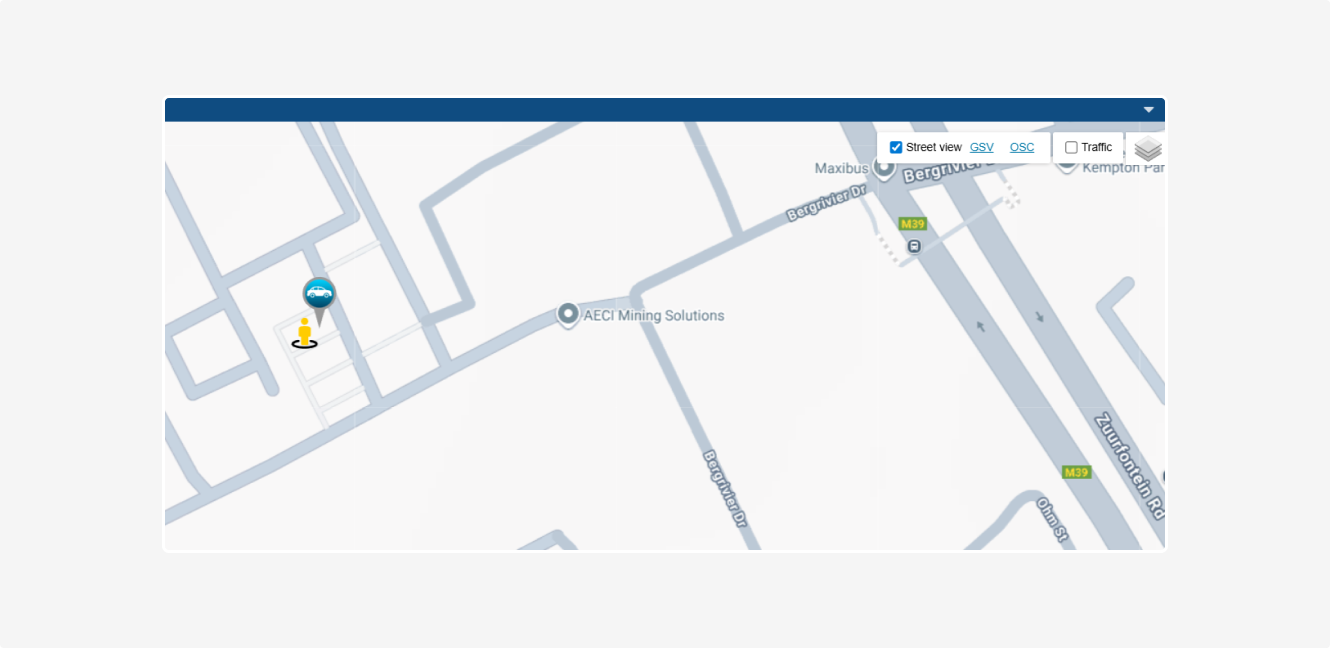
4. After selecting an option, the corresponding panoramic service will open, where you can explore the interactive panoramas of the selected area.
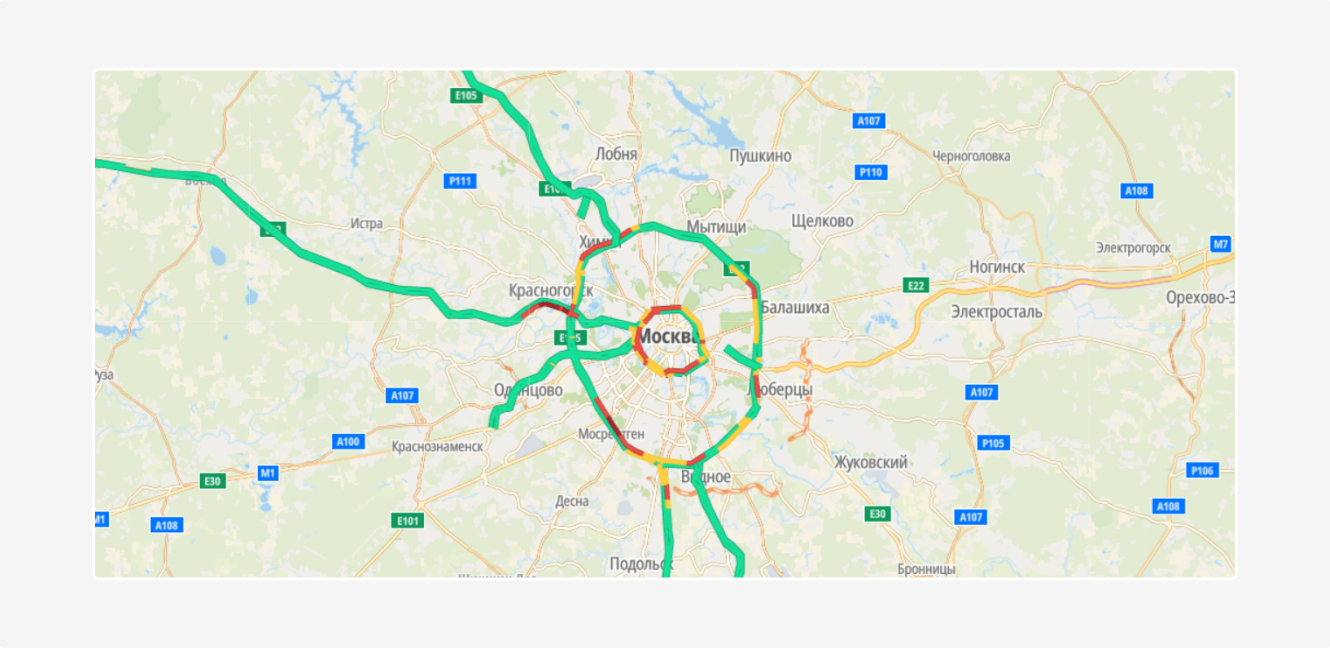
Viewing traffic
The Traffic function shows the current traffic levels using color indicators:
-
Green – free flow of traffic
-
Yellow – moderate traffic
-
Red – heavy traffic
To enable traffic view, check the box in the upper-right corner of the map.
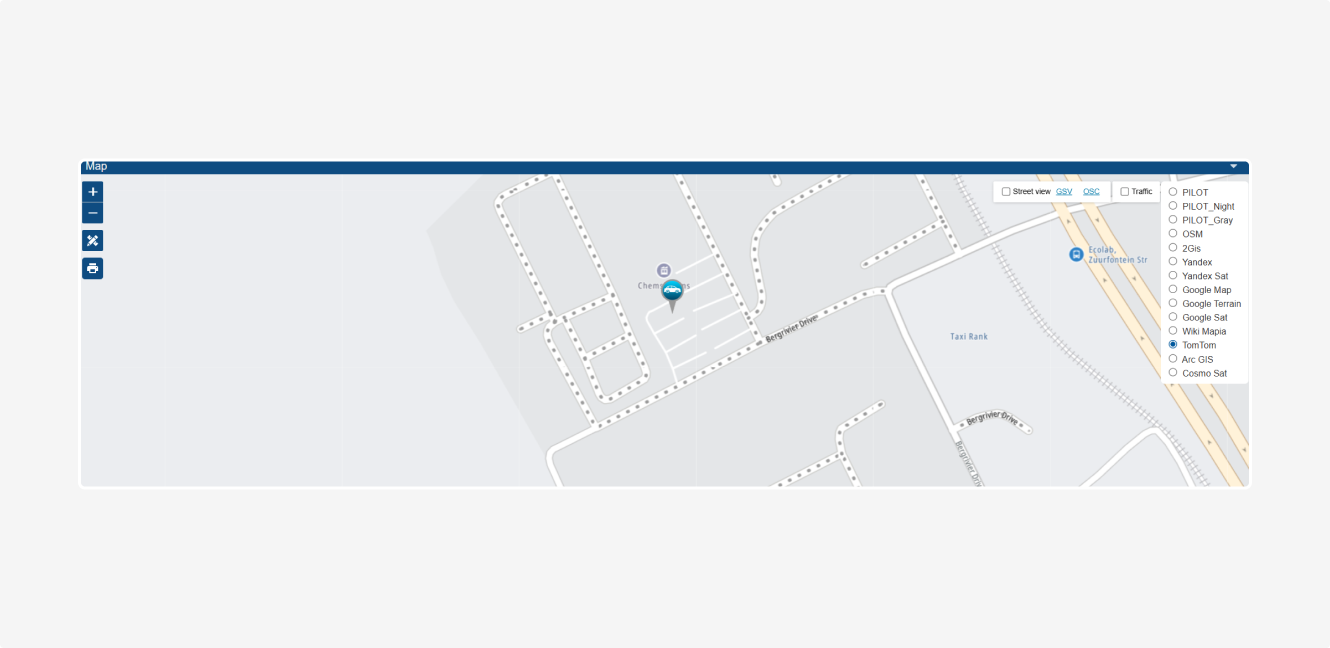
Choosing the map type
You can choose from several map types to display spatial data in the LogBook interface. To change the map type, click the Map type selection button  .
.
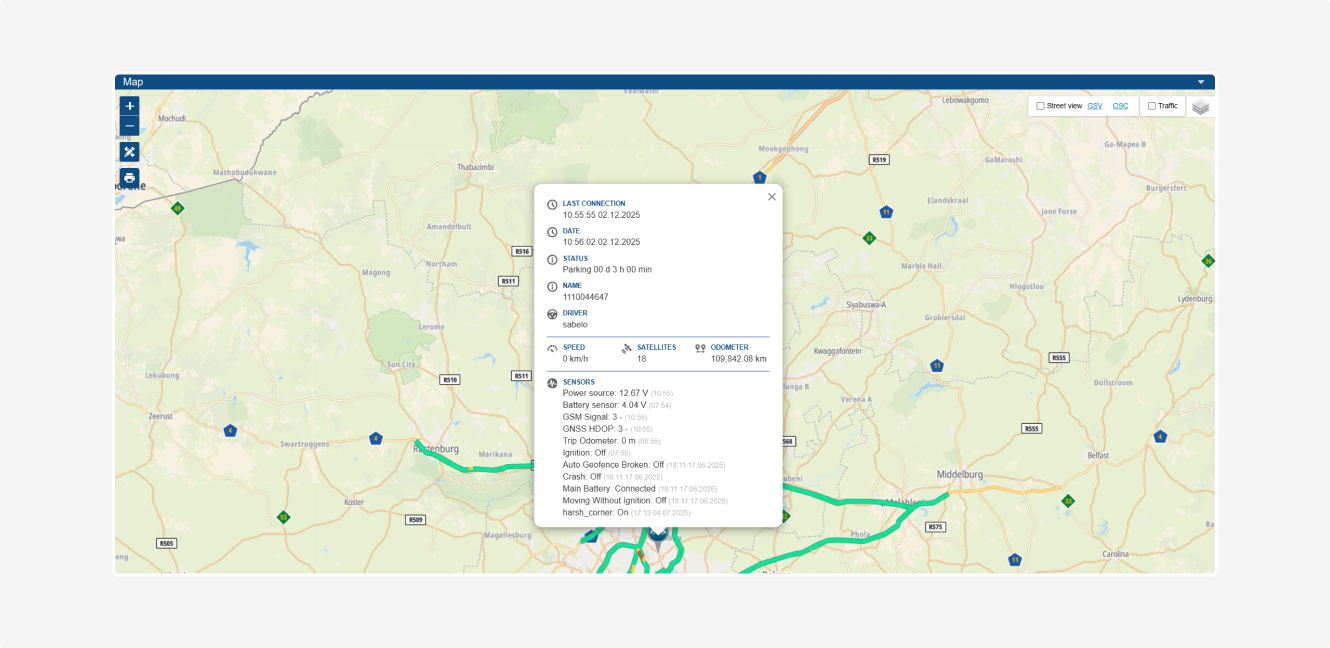
Object tooltip
A tooltip appears when you click on an object on the map after enabling the Show current position function. It provides real-time information about the vehicle’s status.
Editing locations
The Edit locations function allows you to refine the start and end addresses of trips and specify the type of these points.
How to edit a location:
1. Select the trip from the list in the Trips section
2. Click Edit locations
3. Check the box for either Start location or End location
-
Start Location – the starting address of the trip
-
End Location – the ending address of the trip
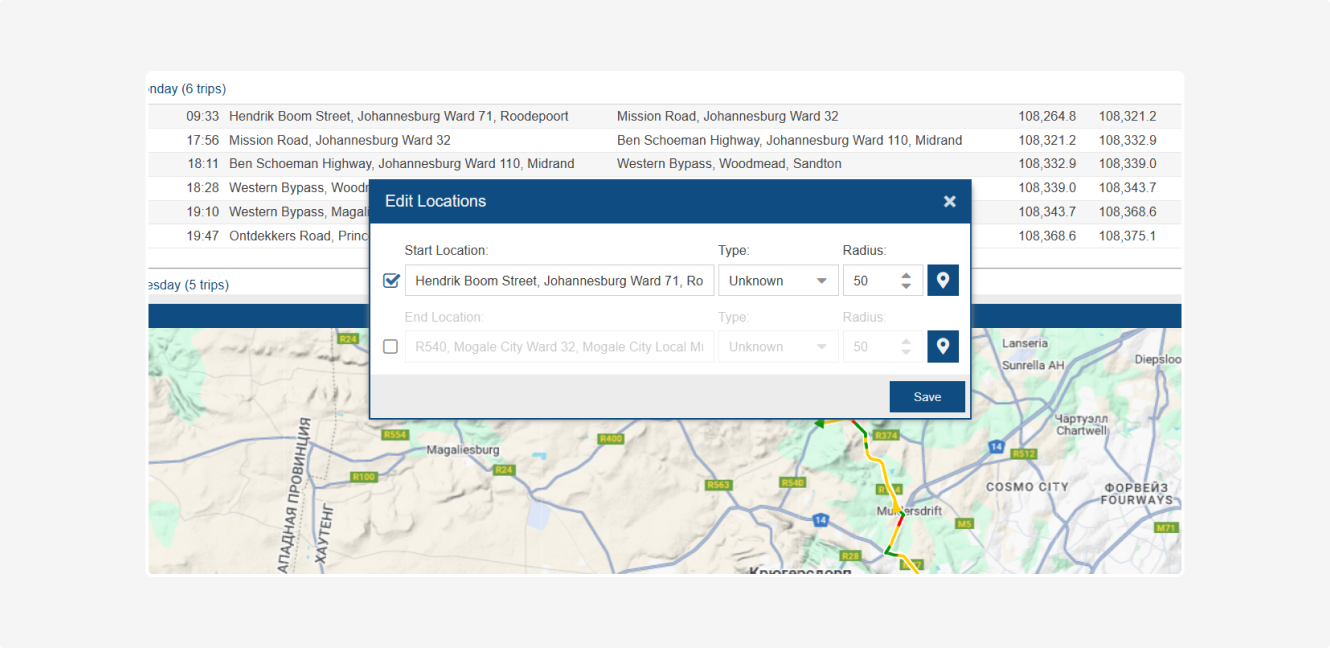
4. Edit the address
5. Choose the Type of location – for example: Home, Office, Client
6. Optionally, set a Radius (in meters) to define the area around the location
7. Click Save to apply the changes
Reports
With the Reports function, you can save trip information for the selected period in PDF or Excel format.
How to Create a Report:
1. In the Trips section, select Reports
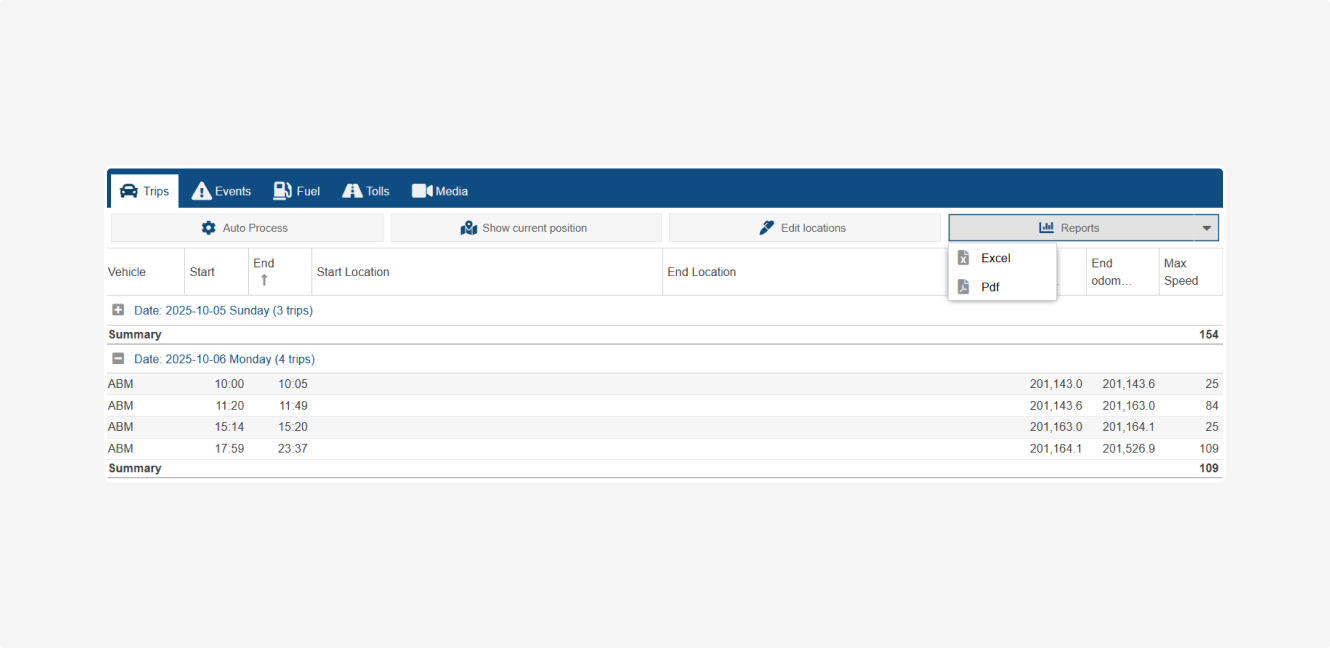
2. Click the dropdown arrow to open the file format menu
3. Choose either PDF or Excel as the file format
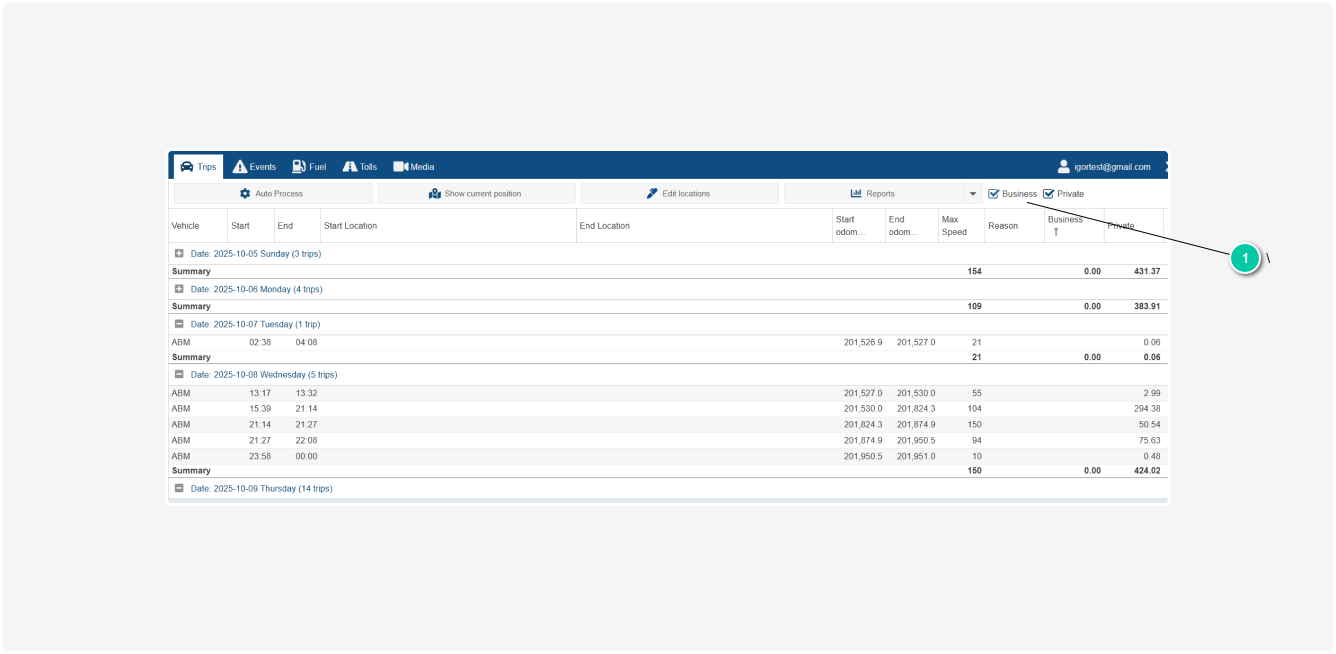
Selecting trip types
In the Trips section, you can manage which trips are displayed in the list. Use the checkboxes to filter by trip type:
-
Business – trips related to work tasks
-
Private – personal trips
Changing the trip type
You can change the type of any trip, whether it's business or private.
How to change the trip type:
1. Find the desired trip in the list
2. Click the Change type button 
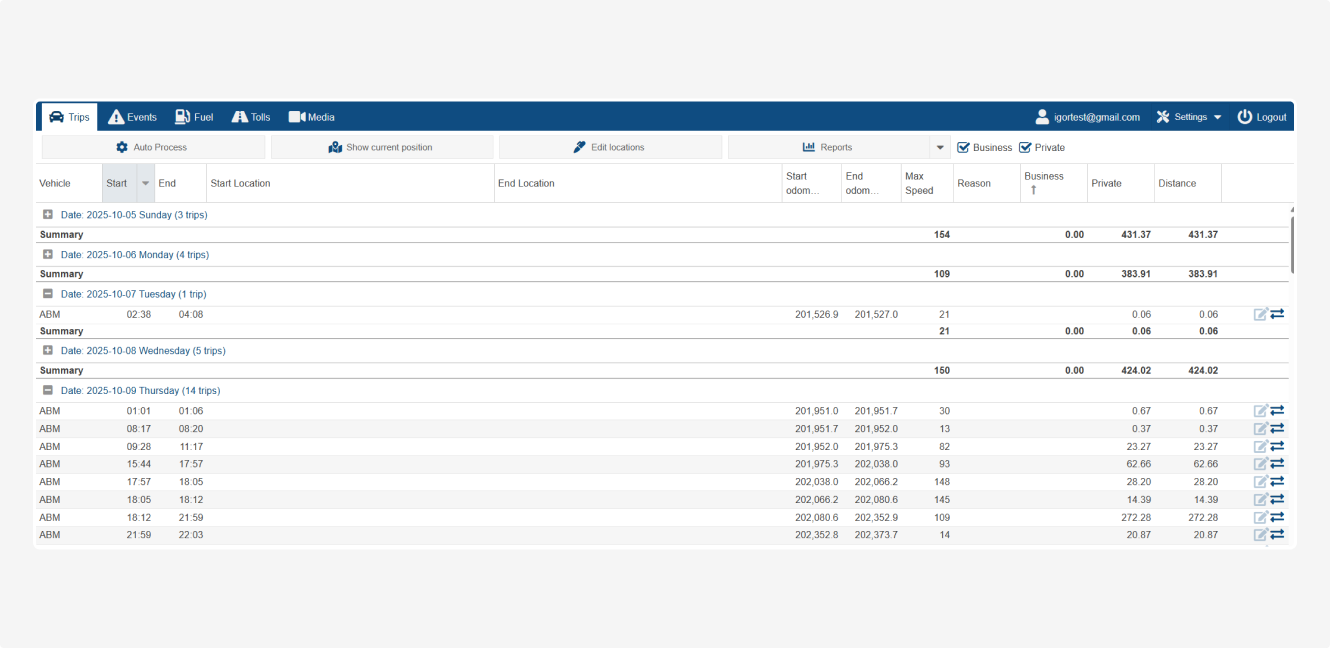
3. The trip type will be updated, e.g., a private trip will be marked as business
Editing business trips
For business trips, detailed editing options are available:
1. Click the edit icon  next to the desired trip to open the details
2. At the top of the window, you will see the date and time of the trip
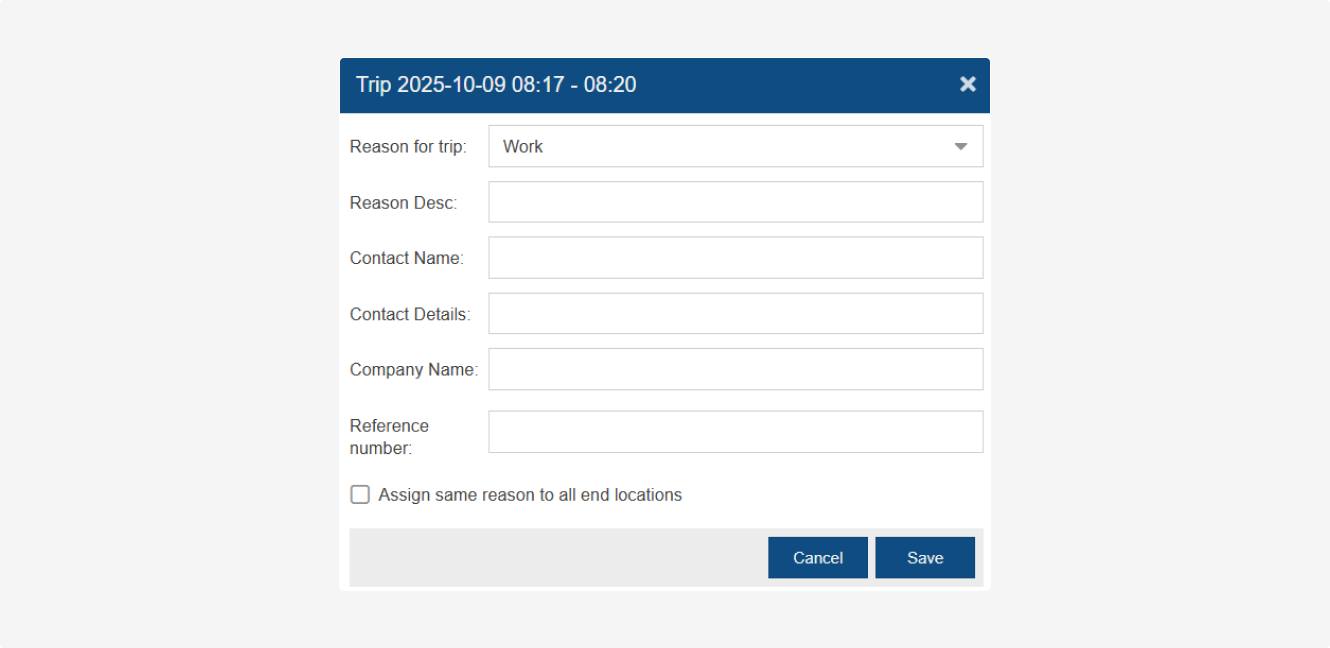
This form allows you to describe the business trip in detail:
-
Reason for Trip – Select the reason, e.g., work, delivery, repair
-
Reason Description – Provide a brief description of the purpose of the trip
-
Contact Name – The person you visited
-
Contact Details – Phone number, email, or other contact information
-
Company Name – The client or partner’s company name
-
Reference Number – The task number
-
Assign same reason to all end locations – If checked, the selected reason and details will automatically apply to all trips ending at the same location3. Click Save to apply the changes
In the Events section, you can track events related to trips, such as:
— when a vehicle starts or finishes a trip
— when a refueling happens
— when speeding occurs, a sensor is triggered, etc.
You can not only view events in a list but also display them directly on the map, helping you better understand where and under what conditions they occurred.
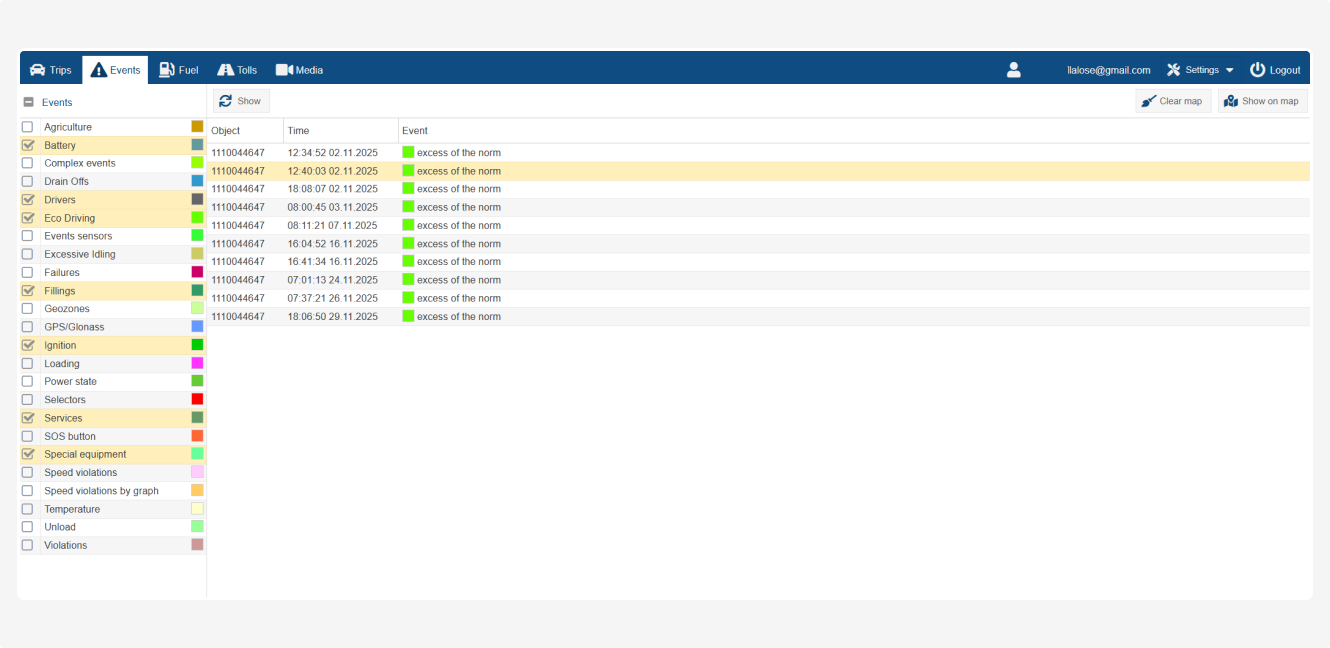
How to view events
1. Go to the Events section
On the left, you’ll see a list of event groups (e.g., Battery, Eco Driving, Fillings, Speed Violations, etc.). These are the available types of events
2. Check the boxes next to the events you want to view, such as Fillings (fueling), Speed Violations (speeding), or Ignition (engine on/off)
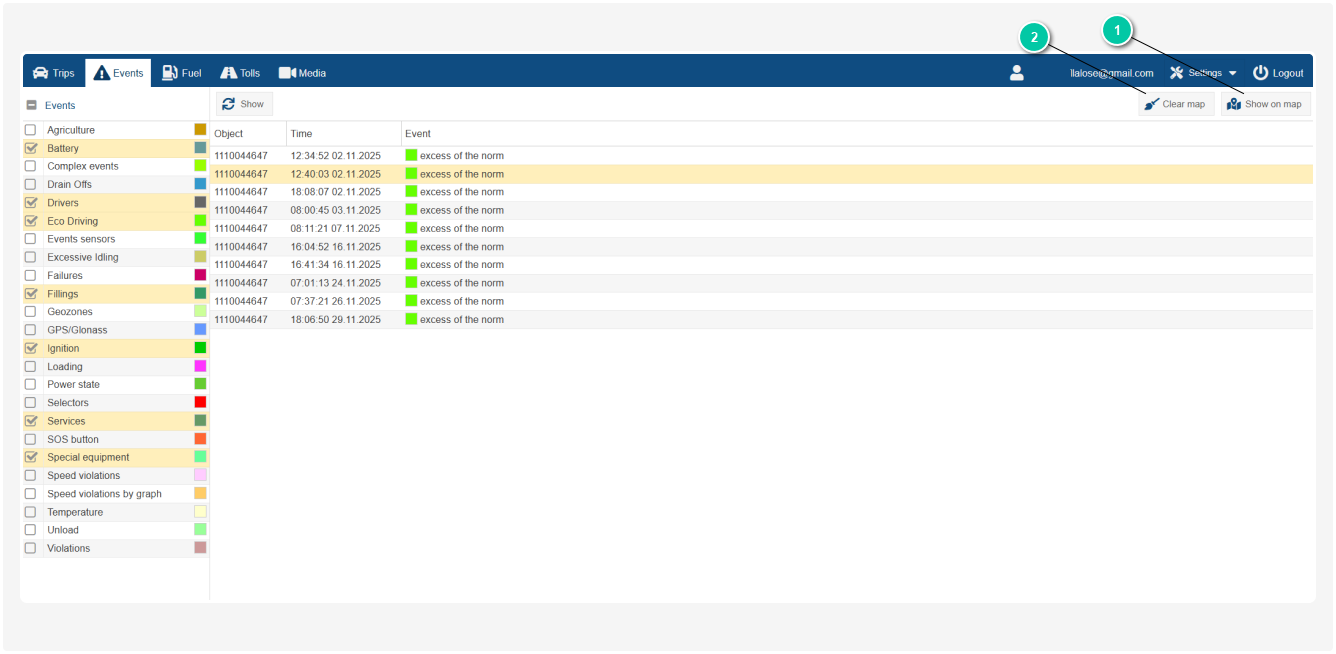
1 — Show on map
2 — Clear map
3. Click the Show button
How to view events on the map
1. Select one or more events from the list
2. Click Show on map
The selected events will appear on the map with icons marking where they occurred.
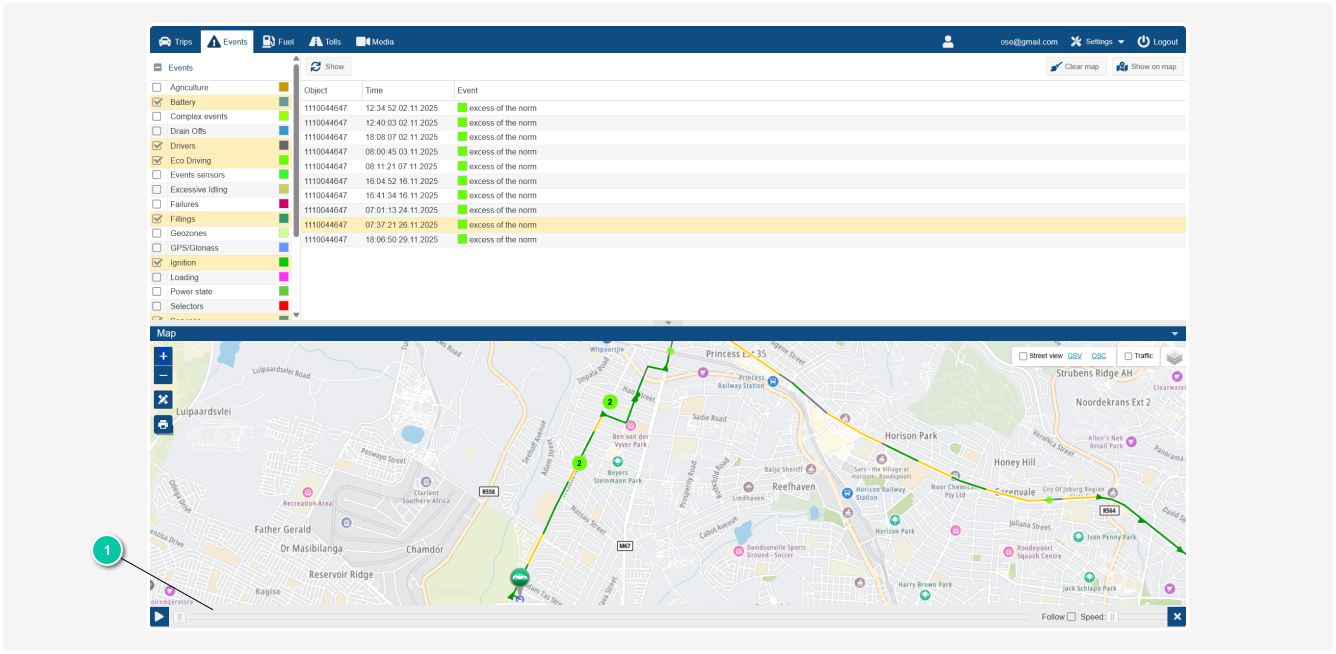
At the bottom of the map, there is a player that allows you to review the route and events during the trips.
If you want to remove the markers from the map, click Clear map.
In the Fuel section, you can view all transactions related to fuel for the selected vehicle and period. Here, you can:
-
See the total fuel expenses for the chosen period
-
Review transactions from fuel cards, including:
-
Date and time of refueling
-
Fuel volume
-
Amount charged for each transaction
-
Fuel station (gas station) location
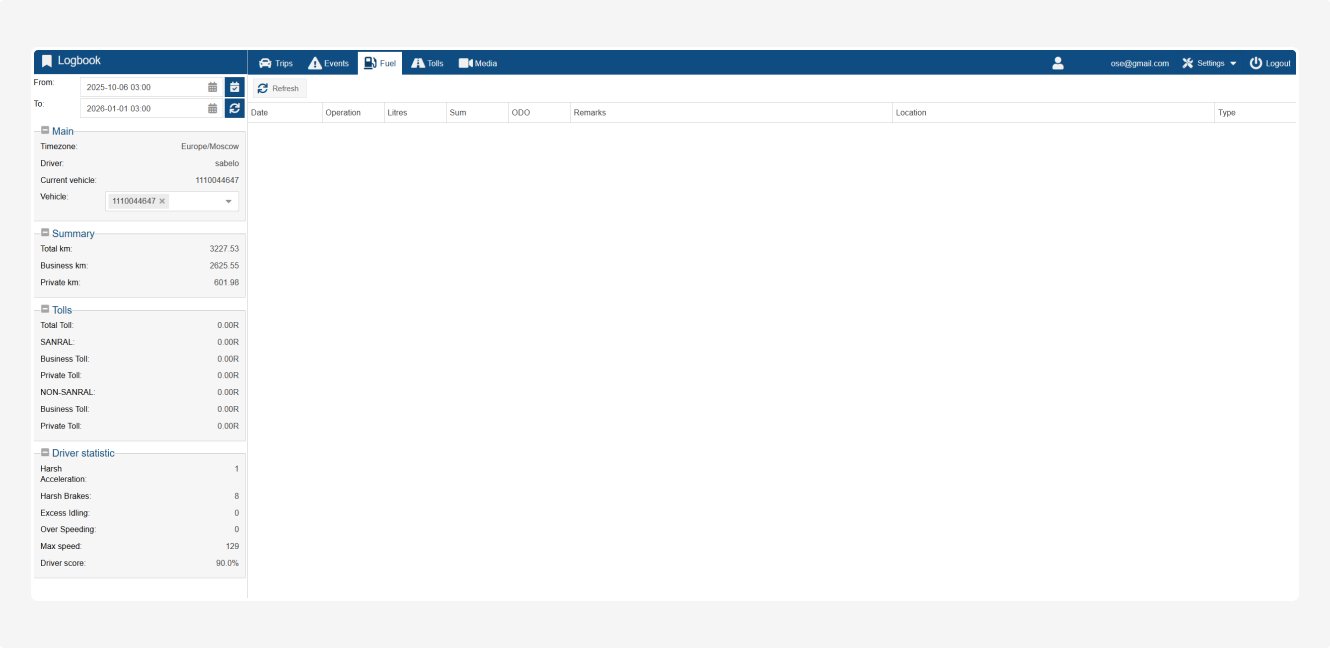
How to view fuel transactions
1. In the left panel of LogBook, select the period using From / To and choose the Vehicle
2. Go to the Fuel section
3. Click Refresh to load all fuel transactions for the selected period.
All transactions will then be displayed in the list.
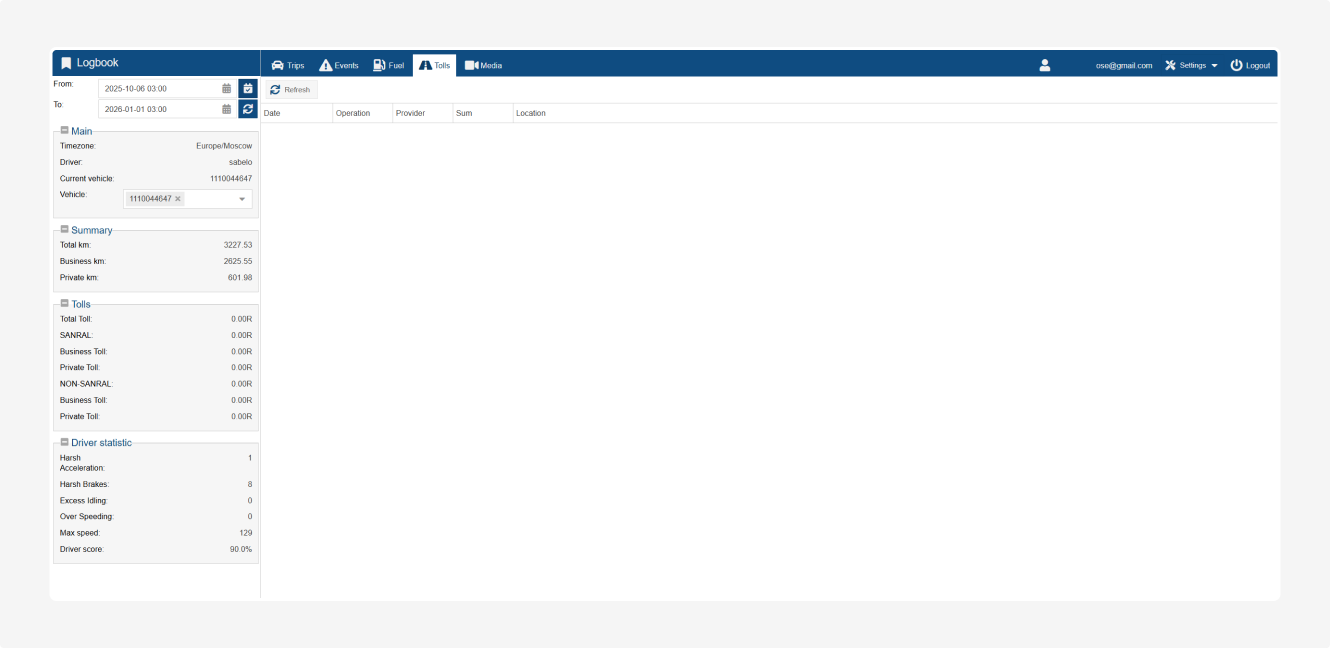
In the Tolls section, you can view all transactions related to toll roads for the selected vehicle and period.
Here, you can see:
— when and where the vehicle used toll roads
— the amount charged for each toll transaction
The Media section is designed for working with video and photo files captured by in-vehicle cameras.
To find media files, you can use the filters at the top of the screen:
-
Evidence Type— All – displays all media files without restrictions— Investigate – materials us=ed for incident reviews and investigations (e.g., accidents)— Trainable – recordings suitable for driver training— Vault – important materials stored in the archive for long-term retention— Custom – user-defined materials with a custom category
-
Sub сategory – select a subcategory for filtering (e.g., NTF, FTI, etc.)
-
Description – enter part of the text that appears in the Description column of media files
After selecting the necessary filter options, click Refresh to load the media files that match your criteria.
For each media file, the following information is displayed:
-
Date – when the recording was made
-
Group – the group assigned to the file
-
Vehicle – the vehicle number or ID from which the file was captured
-
Driver – the driver operating the vehicle at the moment of recording
-
Channel – which camera the file came from (front, cabin, etc.)
-
Alarm – which event triggered the recording (e.g., harsh braking, speeding, SOS button)
-
Type – the file format
-
Category – media category
-
Description – a short explanation of what is shown or why the recording was made
-
Location – where the recording occurred: an address or map coordinates
