Zone 2 Zone
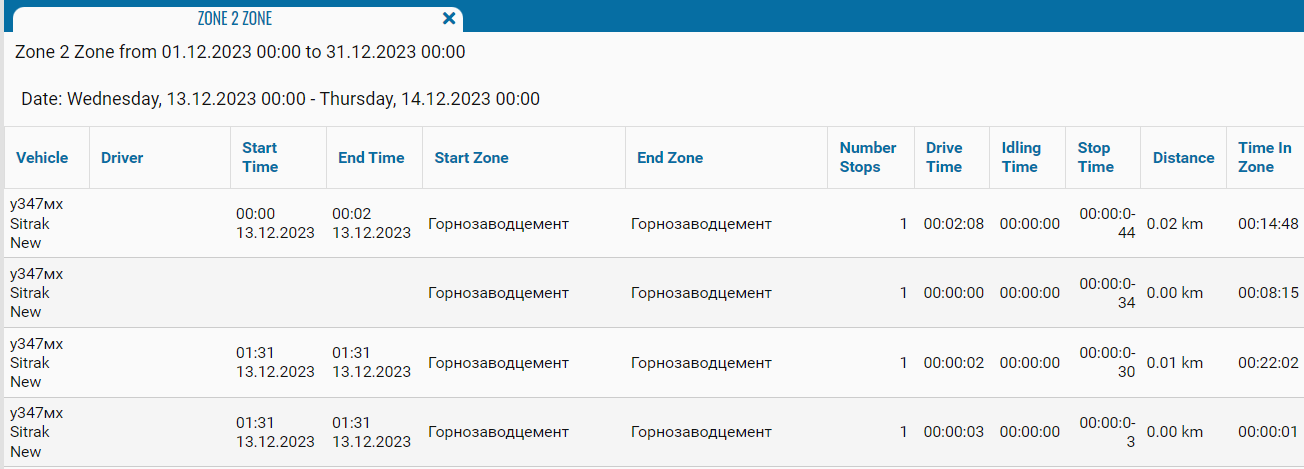
The logic of the report is to use only related and working zones and will provide data from zone to zone.
The report contains:
• Vehicle - object monitoring in the system;
• Driver - the driver assigned to this monitoring object.
• Start time - start date of the run;
• End time - start date of the run;
• Start zone - date and time of the start of movement in the zone;
• End zone - date and time of the end of movement in the zone;
• Number of stops - number of stops in zones;
• Driver time - travel time between zones;
• Idling time - downtime in zones;
• Stop time - time of stops in zones;
• Distance - distance traveled by the monitoring object in km;
• Time in zone - time spent in the zone.
It is necessary to set up zones on the object and create work zones in the Geozones module.
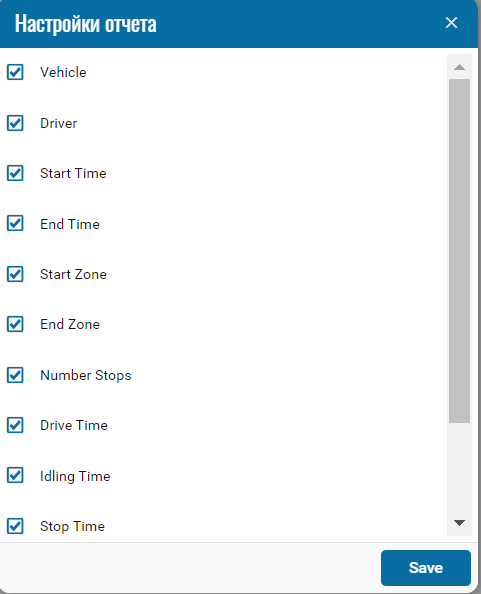
If necessary, you can disable certain parts of the report by clicking on the icon  , when pressed, a menu opens where you can disable / enable certain fields.
, when pressed, a menu opens where you can disable / enable certain fields.