Trailers
The Trailers module allows you to create, configure, and manage trailers used together with monitored objects.

A trailer can be used in two ways:
-
As an informational object — stores trailer information and can be assigned to a vehicle.
-
As a monitored object — has its own GPS tracker and sensors and sends data to the system.
When a trailer is assigned to a vehicle, the system displays them as a single unit, allowing you to monitor both the towing vehicle and the trailer.
In this article you'll learn how to:
1. Go to the Trailers tab
2. Click Add 

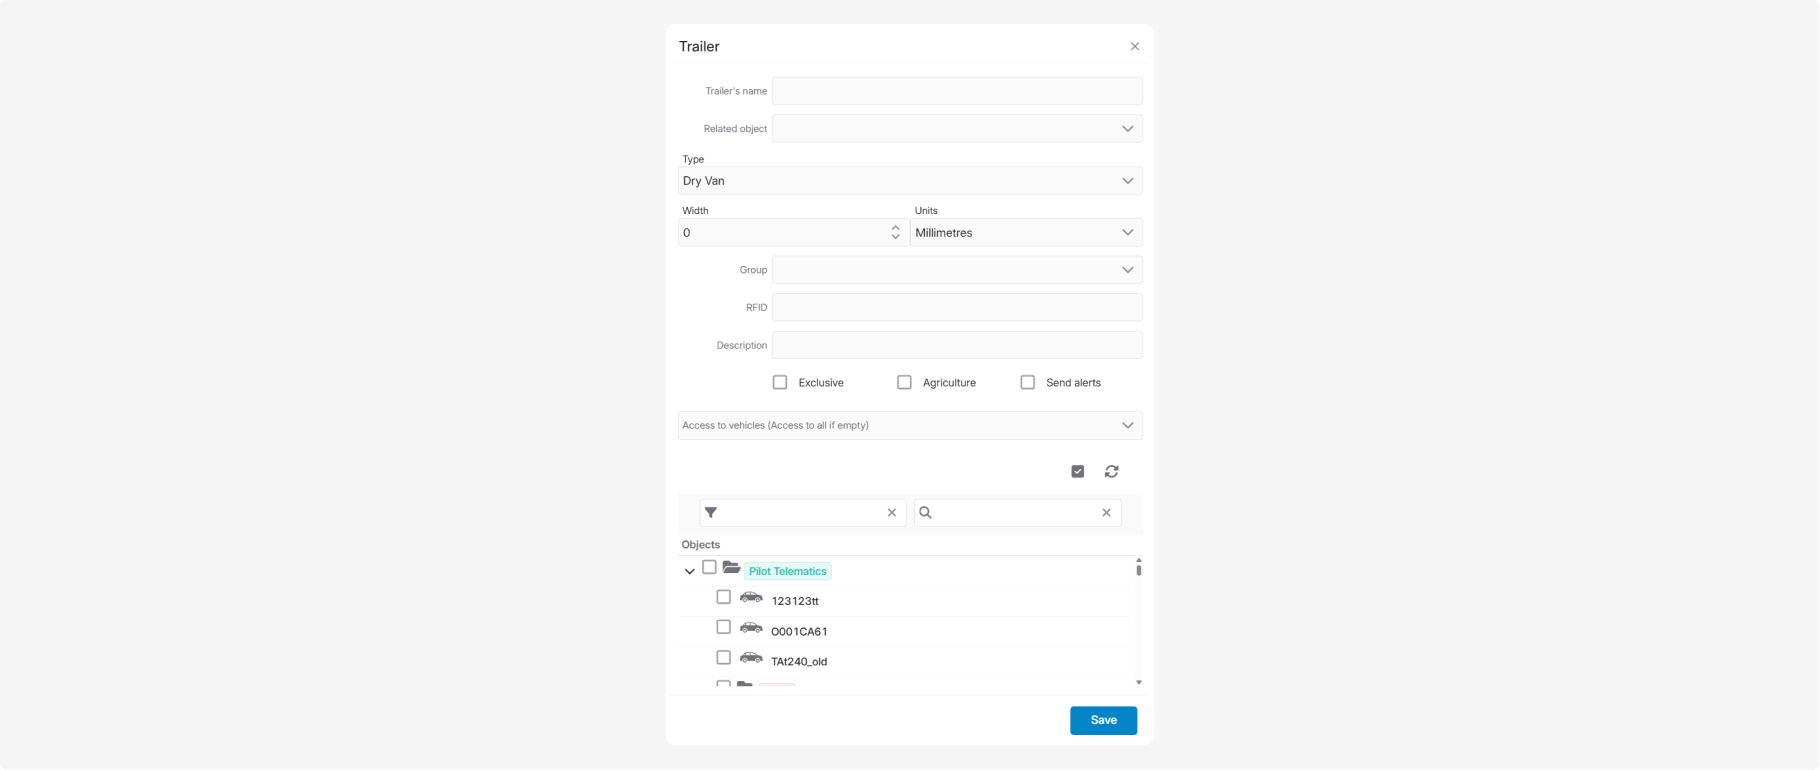
The Create trailer window opens.
Fill in the required fields and click Save.
-
Trailer name — the name under which the trailer will be displayed in the system
-
Related object — select the monitored object associated with this trailer. The trailer will receive location, sensor, and other data from this object.
A related object is not the vehicle to which the trailer is attached. It is the monitored object whose data belongs to this trailer.
|
-
Type — select the trailer type

If the required type is not available, contact technical support to have it added.
|
-
Width — enter the trailer width and select the unit of measurement: millimeters, centimeters, meters
-
Group — select the group to which the trailer belongs
-
RFID — the RFID code transmitted by the vehicle's RFID sensor when the trailer is attached. The system uses this identifier to automatically determine which trailer is connected to the vehicle
-
Description — additional information or comments about the trailer
Additional settings

-
Exclusive — controls how trailers are assigned to vehicles. When enabled, assigning this trailer automatically unassigns any other trailers currently attached to the same vehicle.
Use this option if only one trailer can be connected to the vehicle at a time.
-
Agriculture — used together with the Agro module. Enable this option only for objects that use agricultural functionality.
-
Send alerts — enables notifications for events related to this trailer
Object access
Select the objects that should have access to this trailer. If no objects are selected, the trailer will be available to all objects.

A trailer can be assigned to a vehicle in two ways.
From the trailer card
At the bottom of the trailer card, open the Objects section.
Select one or more vehicles to which you want to assign the trailer or grant access.

To select all vehicles in the list, click Select all  .
.
.
To find a specific object, you can use:
-
the filter

-
search with highlighted matches
 — matching characters are highlighted in yellow
After selecting the required objects, click Save.
From the object card
1. Select an object in the object list
2. Right-click the object
3. Select Trailers from the context menu
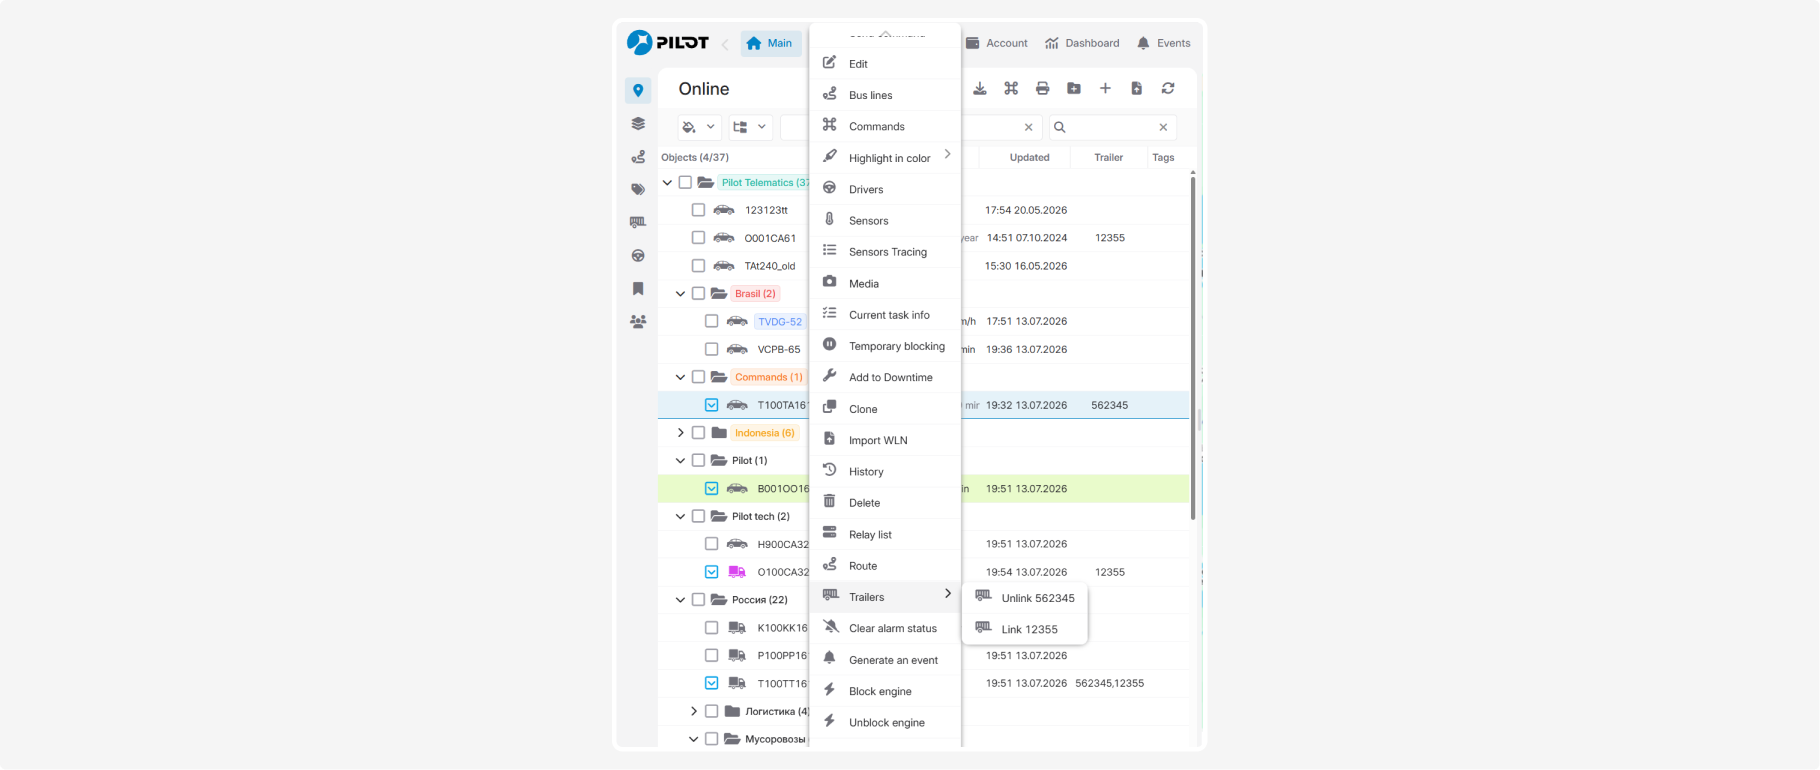
4. Choose one of the following actions:
-
Assign — attach a trailer to the vehicle
-
Unassign — detach the currently assigned trailer
After a trailer is assigned:
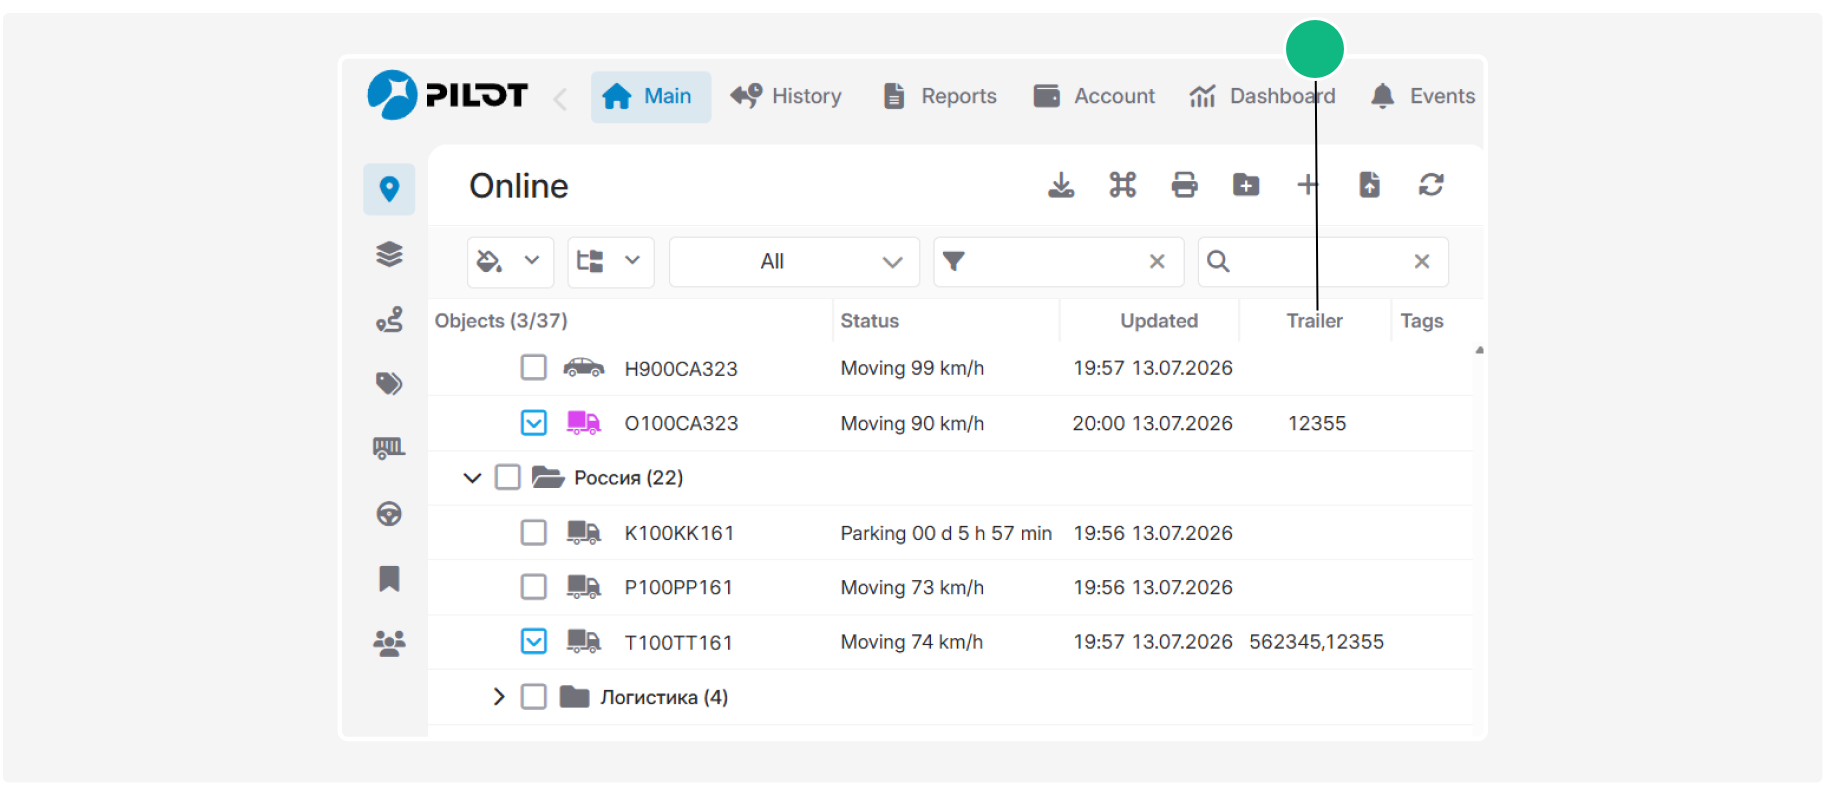
— the vehicle icon on the map changes to indicate that a trailer is attached

— the Trailer column in the object list displays the name of the assigned trailer
Trailer information on the map
You can view trailer information in the object's map tooltip.
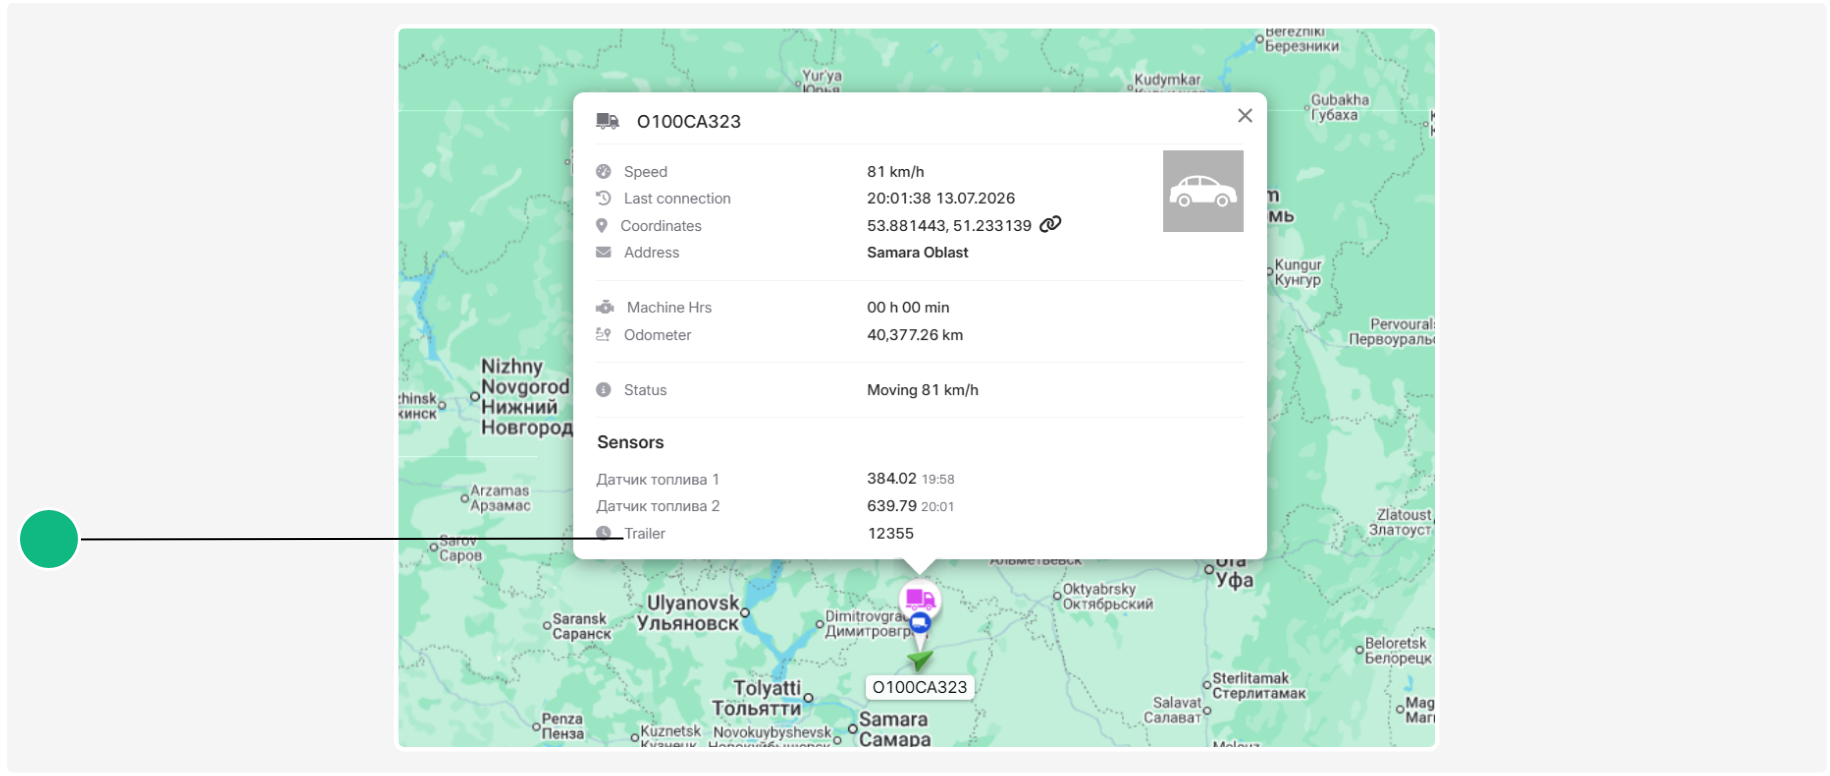
To open the tooltip, click the object's icon on the map.
If trailer display is enabled, the tooltip shows information about the assigned trailer.
If an associated object is configured, you can also view data received from the trailer's GPS tracker.
To display trailer information in the map tooltip:
1. Go to Account settings
2. Open the Personalization tab
3. Under Tooltip iteams, enable the Trailer option

4. Click Save
Trailer information in the object list
To view trailer information, hover over an object in the object list.

To enable tooltips in the object list:
1. Go to Account settings → Personalization
2. Enable Show object tree tooltips

A history of trailer assignments is available for each trailer.
To open the history:
1. Right-click the trailer on the Trailers tab
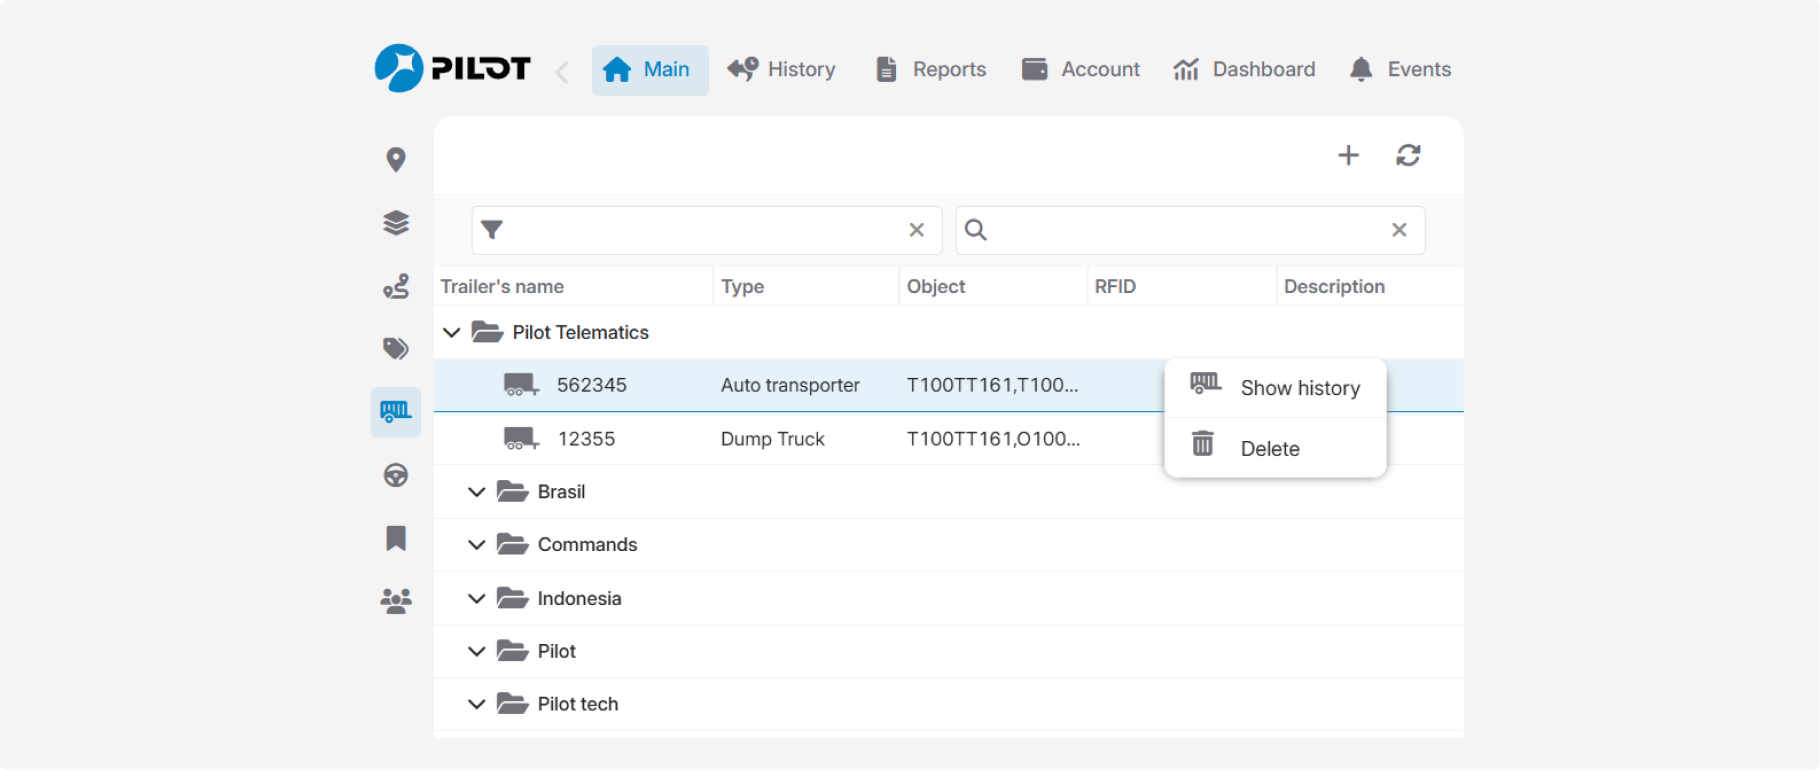
2. Select Show history
The history includes:

-
the object to which the trailer was assigned
-
the trailer name
-
the assignment date and time
-
the unassignment date and time
-
the RFID code
To delete a history entry, click the Delete icon  .
.
.1. Right-click the trailer on the Trailers tab
2. Select Delete