How to configure report columns
To make sure a report shows the data you need, you must add and configure columns in the Report Builder.
Each column defines:
-
what information is displayed in the report,
-
and how that information is processed.
How to add a column:
1. In the Report builder, click the  button in the Columns section
2. Fill in the settings for the new column
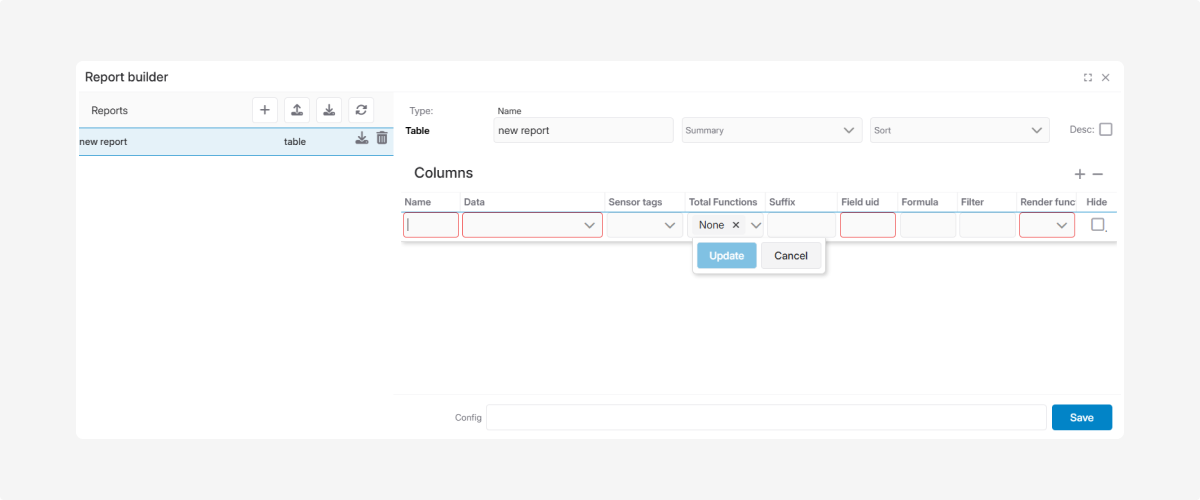
Column settings
1. Name
Enter the column name that will appear in the report header.
2. Data
Select the data field that will be used in this column from the drop-down list.

3. Sensor groups
Lets you choose a specific sensor group.

4. Total Functions
This setting defines how the system calculates totals in the bottom row of the table.

|
Value
|
What it does
|
|
None
|
No total is calculated for the column
|
|
Sum
|
Adds up all values in the column
|
|
Average
|
Calculates the arithmetic mean
|
|
Max
|
Shows the highest value in the column
|
|
Min
|
Shows the lowest value in the column
|
|
Formula
|
Lets you define a custom calculation formula
|
You can select more than one function for a single column.
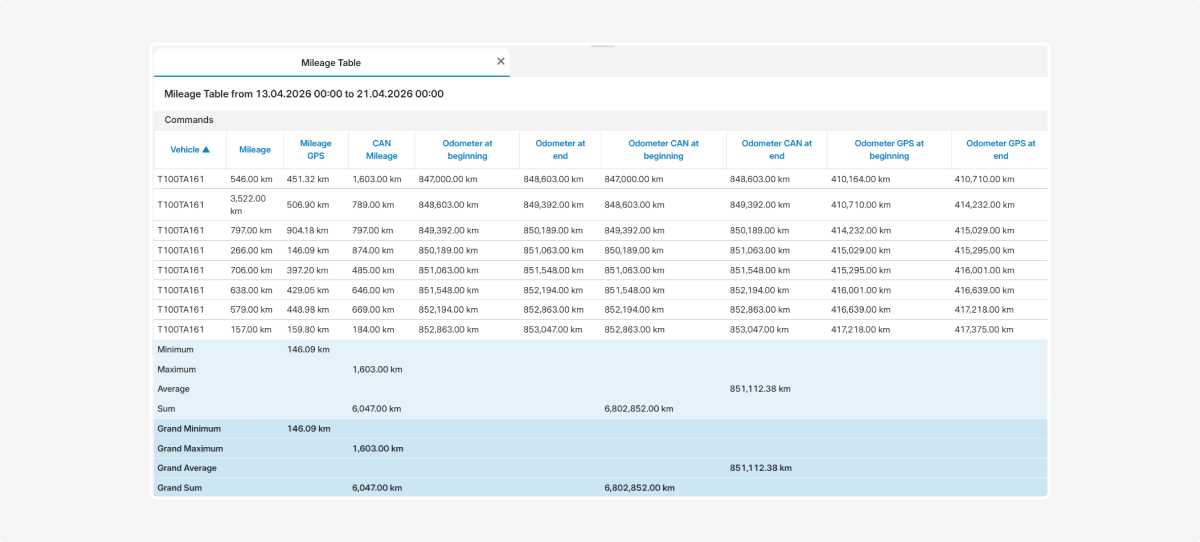
Example of totals in a mileage report
-
CAN mileage — Sum, Max
-
GPS mileage — Min
-
CAN mileage at start — Sum
-
CAN mileage at end — Average

In the generated report, total values will appear in the bottom row based on the selected functions.
5. Suffix
Specify the text that will be displayed after the value, such as km, l, km/h, °C, or hours.
6. Formula
Lets you use mathematical expressions, for example:(%odometer_end% - %odometer_begin%) / 100.
7. Filter
Lets you filter values inside the column. This is used to show only the data you need, for example only events where speed is above 80 km/h.
8. Render function
Lets you apply special formatting to the value, such as rounding, date conversion, unit conversion, and more.
9. Hide
Check this box if the column is needed only for calculations, for example in a formula, but should not be shown in the final report.
How to delete a column
Click the column and then click the Delete button  .
.
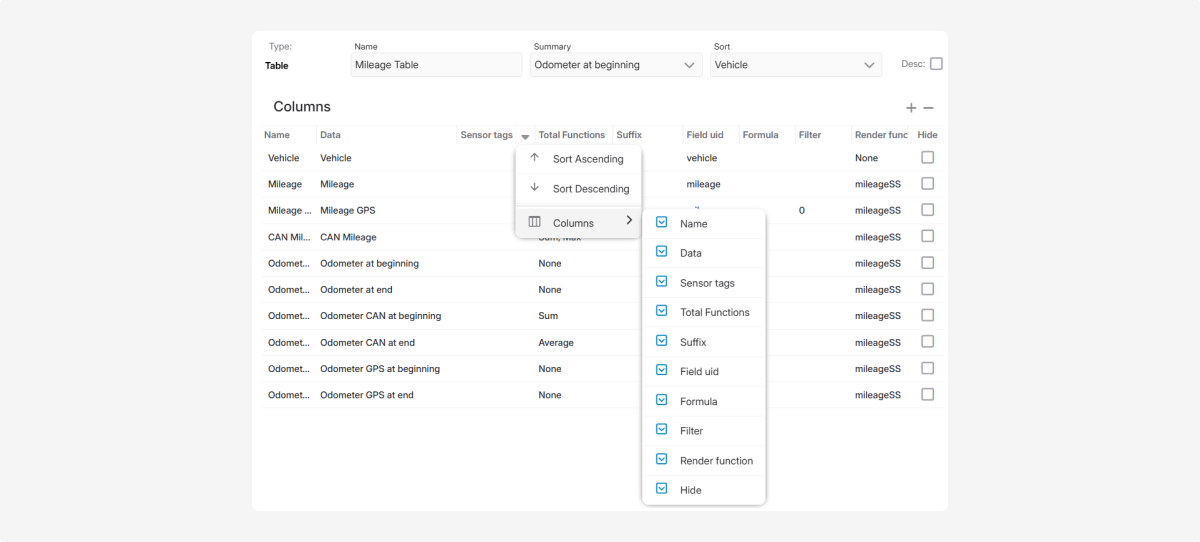
How to configure the columns table
You can set up the columns table the way you prefer and choose which parameter columns should be displayed.
1. In the header of any column, click the arrow icon  . A menu with column settings will appear:

-
sort data in ascending or descending order
-
choose which columns to display2. To configure which columns are shown:
-
click Columns — a list of available parameters will open
-
check the boxes next to the parameters you want to see in the table column
How to use formulas in report columns
The Report builder supports two ways of adding formulas:
1. Formula for an existing field — apply a formula to an already existing data field

2. Custom formula — create a new column based on a formula that uses multiple fields

Formula for an existing field
Use this when you want to modify data in an existing field.
How to set it up:
1. Add a column with an existing data field, for example Idle time
2. In the Formula field, enter the expression that will be applied to this field
Example
In the Fuel Consumption While Driving report, the Idle time column uses the formula: =%te%-%ts%.
This expression calculates the difference between the end time (te) and the start time (ts) of the idle period.
Custom formula
Use this when you want to create a new column based on several data fields.
How to set it up:
1. Add a new column
2. In the Data field, select Formula
3. In the Formula field, enter an expression using the data field identifiers
Example
In the Fuel Consumption While Driving report, the Fuel consumption while driving column is configured like this:
-
Data: Formula
-
Formula: =%fuel%/((%te%-%ts%)/60/60)
This formula calculates fuel consumption per hour:
-
%fuel% — fuel consumption from the sensor
-
(%te%-%ts%)/60/60 — time in hours, calculated from the difference between the end and start times of the event, divided by 3600 seconds
After you save the report, the system automatically calculates the value for each row using the specified formula.
For more information about formula syntax, see the separate article.