Using the settings on the LogBook portal
In this article, we will explain how to use the settings on the LogBook portal. You will learn how to:
— set up the calendar with weekends and holidays to track work hours
— access and view the user guide for the portal
— view the user activity history on the portal
To ensure that the LogBook system correctly interprets trips on weekends and holidays (e.g., marking them as private), you can configure the calendar.
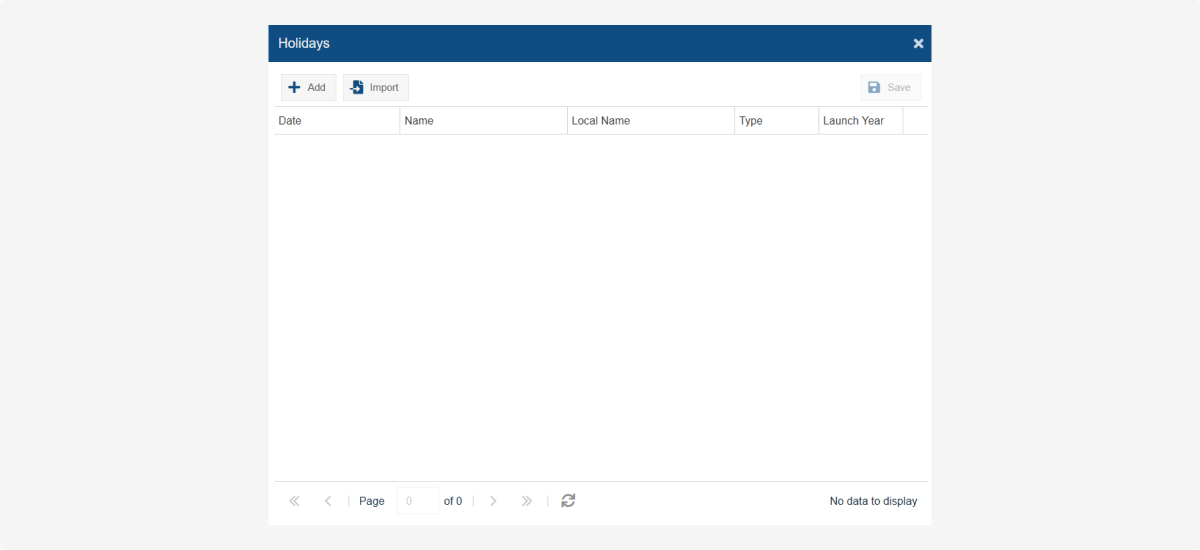
Uploading the work calendar
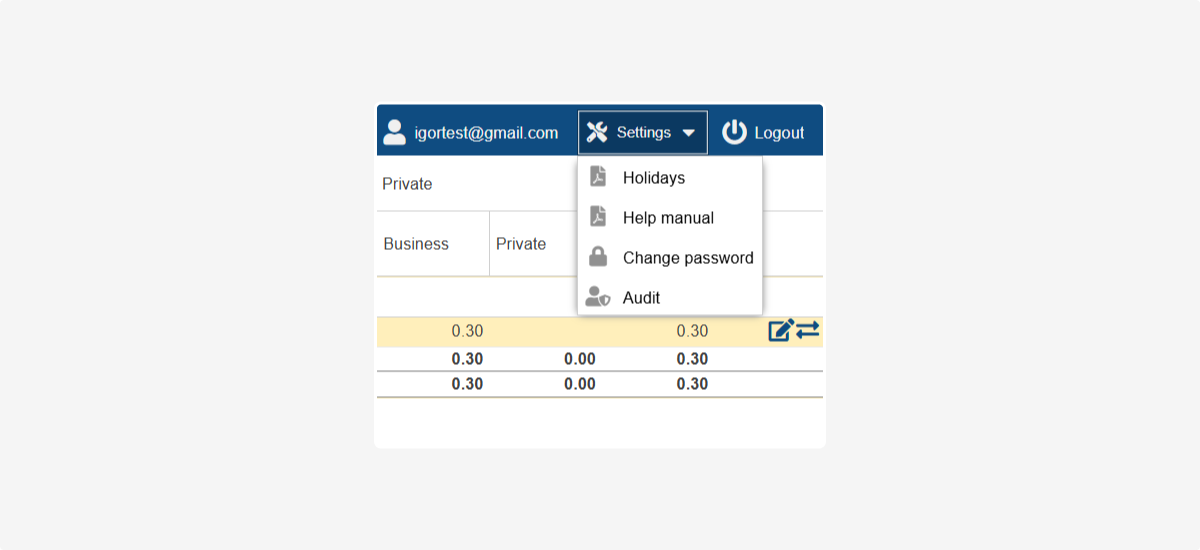
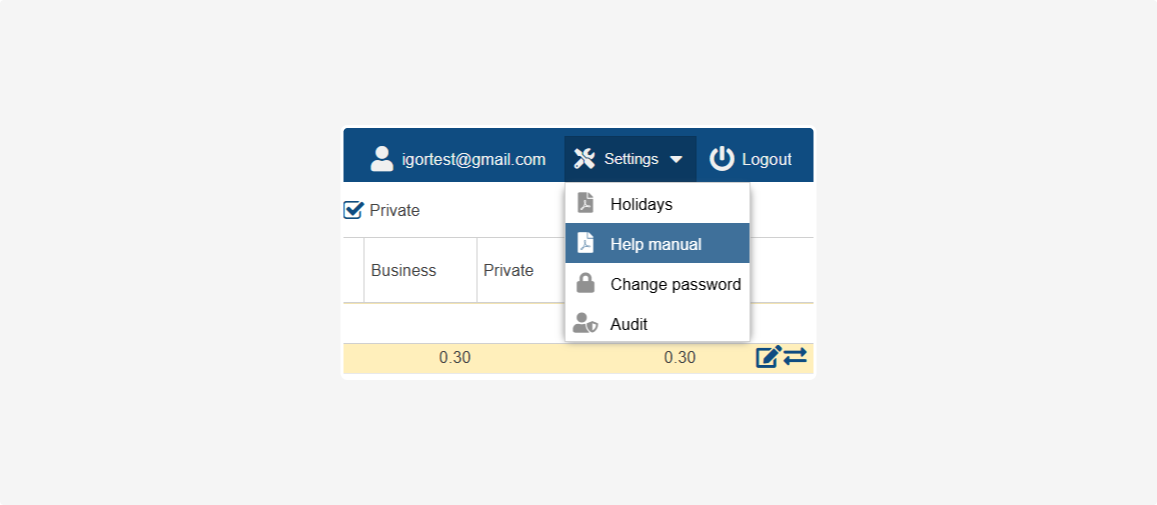
1. Go to the Settings section and select Holidays
2. In the opened window, click Import  to automatically upload the calendar for the desired year
3. Enter the following details:
-
Year – specify the year for which you want to upload the holiday list
-
Country code (2 letters) – for example, ZA for South Africa
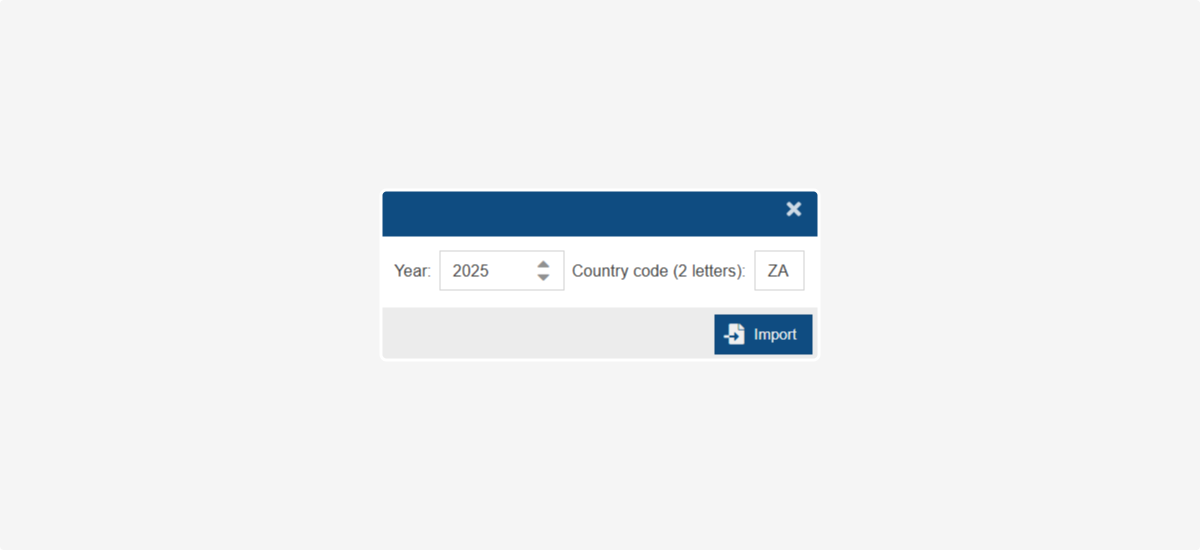
4. Click Save to save the data
Manually adding a holiday
1. Open Settings and select Add 
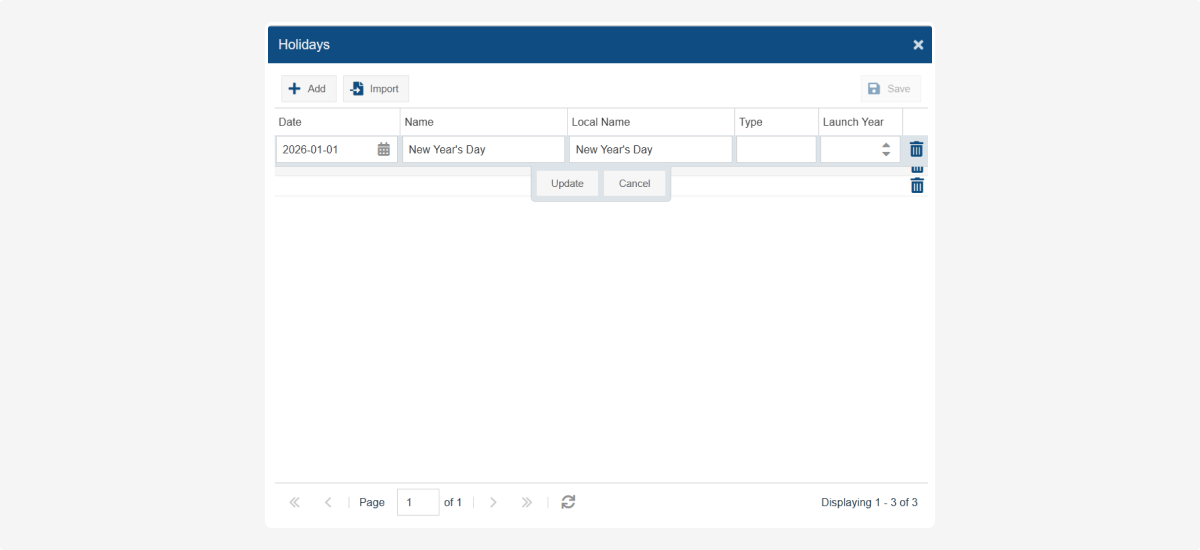
2. Enter the holiday details:
-
Date – select the holiday date
-
Name – specify the official name of the holiday
-
Local Name – the holiday name in your language or company
-
Type – the type of holiday (e.g., national, regional, corporate, etc.)
-
Launch Year – specify the year the holiday is recognized.3. Click Save to save the holiday

If you need more information on how to use the LogBook portal, you can refer to the Help manual.
To change your password for logging into the LogBook portal:
1. In Settings, select Change password
2. Enter the new password and confirm it by typing it again
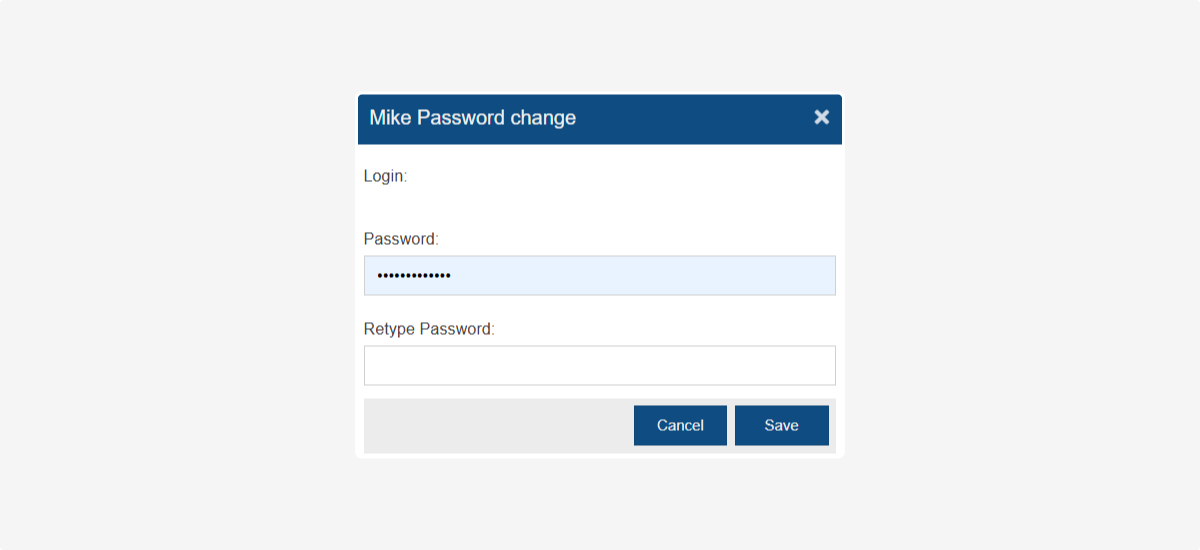
3. Click Save to save your new password
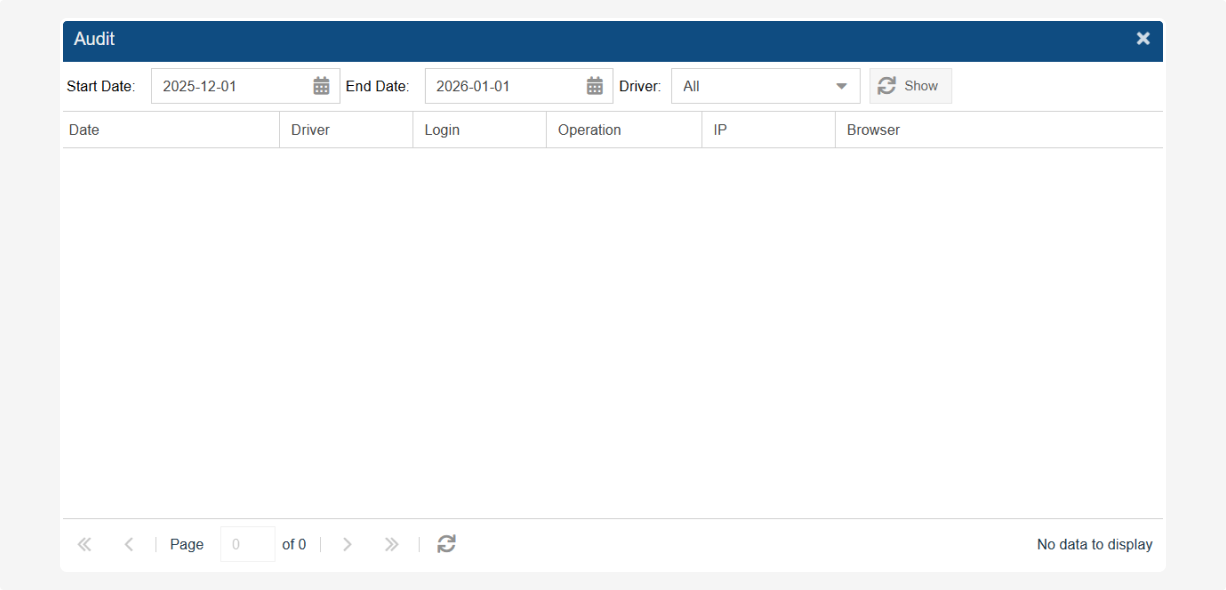
With the Audit feature, you can review the history of actions on the portal.
How to view activity history
1. In the Audit window, select:
-
Start Date – choose the start date for the events you want to display
-
End Date – choose the end date for the events you want to display
-
Driver – select the driver or user whose activity you want to track2. Click Show
After that, you will see a list of all actions for the selected period:
-
Date – when the event occurred
-
Driver – who performed the action
-
Login – under which account the action was performed
-
Operation – what exactly was done
-
IP – from which IP address the action was performed
-
Browser – which browser was used for the operation