Object card
The object card is where you can edit information about an object and configure its parameters.
The card contains several main tabs:
The set of available tabs may vary depending on which modules are connected to your account.
|
In this tab, you specify the main parameters of the object.
To save an object in the system, it is enough to fill in the required fields. However, for full functionality and accurate telematics data, it is recommended to complete all information.
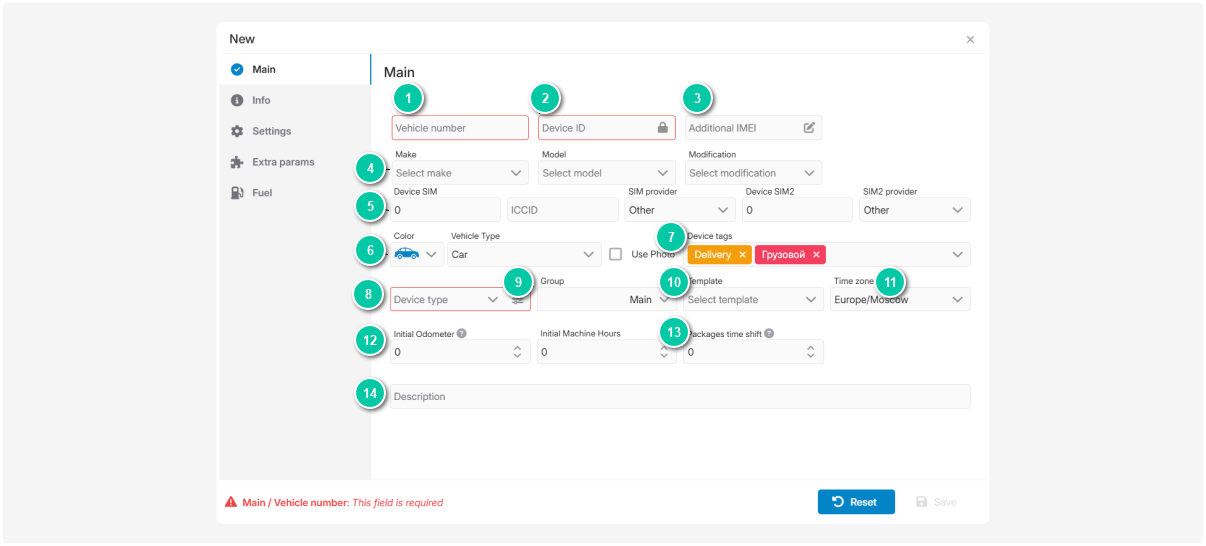
2. Device ID
Enter the unique ID or IMEI of the device (usually written on the device casing).
If you are adding a device via the Telegram bot, enter the ID provided in Telegram.
|
5. Device SIM, ICCID, SIM provider
Device SIM — enter the SIM card number installed in the device (usually a 10-digit phone number).
Device SIM 2 — if the device supports dual SIM.
ICCID — the 19-digit identifier of the SIM card.
SIM provider— select the operator from the list.
If integrated with your SIM provider, entering a SIM phone number or ICCID will allow the system to automatically request and fill in missing identifiers after you press Save.
| ||
9. Group
Assign the object to a group (see Object list for how to create groups).
|
Don't forget to click Save to apply the changes.
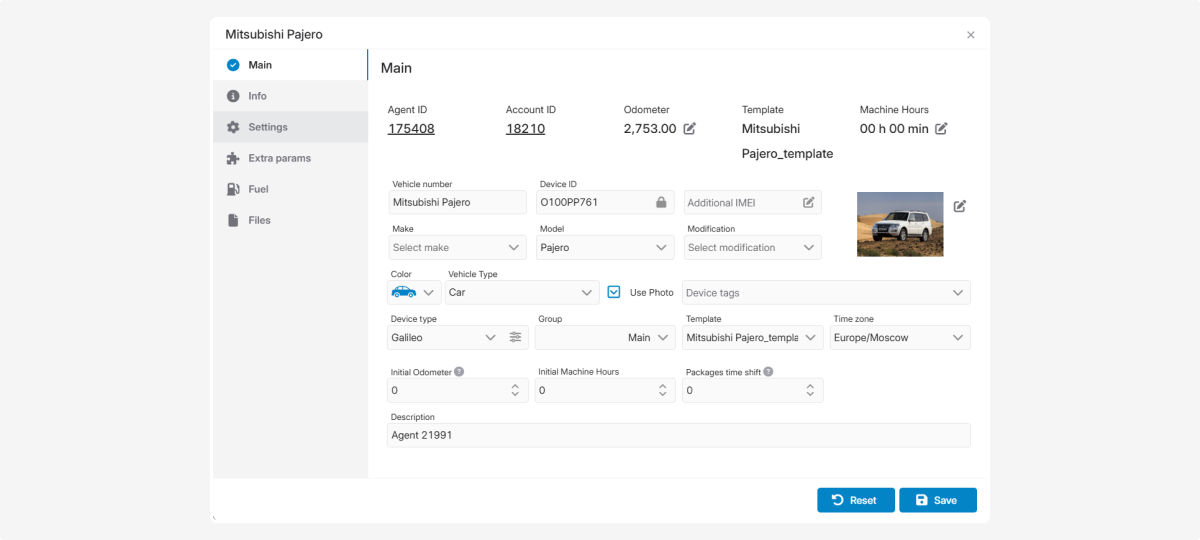
Access rights in the Object card
The set of available fields in the Object card depends on the user’s role in the system.
Depending on the assigned permissions, some fields may be hidden or unavailable for editing.
Access control helps maintain correct settings and ensures stable operation of the object.
For the User role:
-
Fields related to SIM cards are not displayed (SIM, SIM 2, ICCID, SIM Operator)
-
The Device Type field is not displayed
-
The following fields are available in view-only mode:— Initial odometr— Initial Machine Hours— Packeges Time Shift

If you need to change these parameters, please contact a user with Master or Administrator rights.

On the Info tab, enter the vehicle registration data:
-
Year of manufacture
-
VIN code
-
Engine number
-
Engine capacity (liters) — select with arrows or enter manually
-
Engine power (hp)
-
Total number of seats and number of passenger seats
-
Vehicle registration certificate data:
— expiration date — specify the exact expiration date
— issue date — specify the document creation date
-
Registration certificate number and expiration date
-
Insurance policy number and expiration date
To specify the expiration dates, click the calendar icon  and select the date.
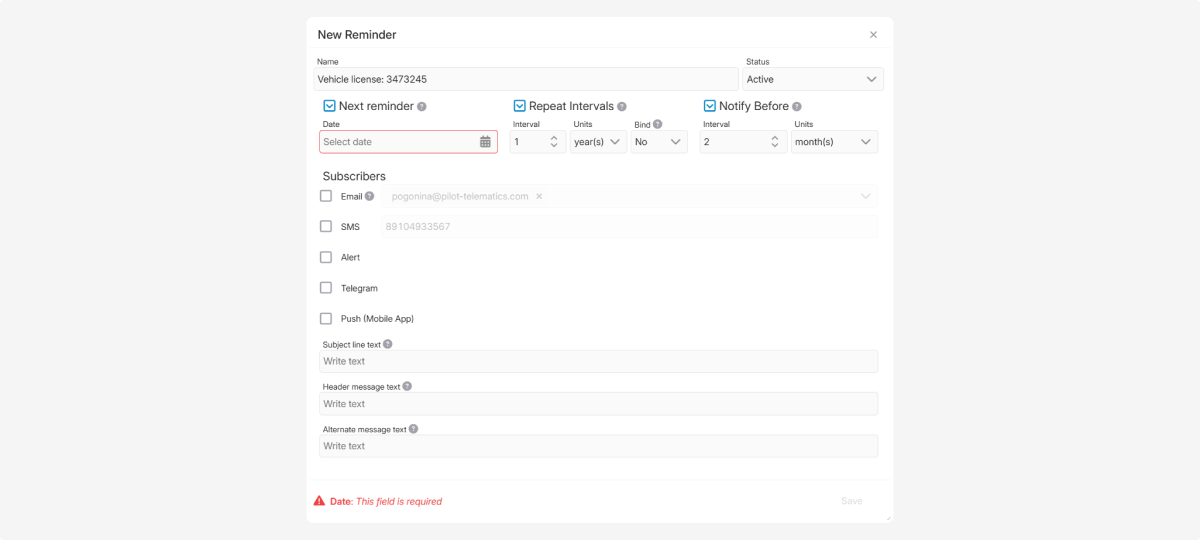
Setting up document expiration reminders:
-
Click the icon
 next to the field to set up a reminder
2. Enter a name for the reminder
3. In the Date field, select the expiration date
4. Specify the repeat interval (reminder sending frequency)
5. Specify how many days before the expiration date to send the reminder
6. Select the delivery method
To receive email reminders, verify your email address in the Privacy section.
|
7. Compose your reminder:
Subject (what the reminder is about)
Headline (what will appear at the top of the message)
Message text (you can use variables for auto-complete):
%current_time% - current time
%reminder_name% - reminder name
%current_moto% - current engine hours
%current_mil% - current mileage in miles
%agent_id% - invoice number
%vehicle_name% - vehicle name
%driver_name% - driver name
Example: Insurance for %vehicle_name% expires %current_time%.
8. Click Save — the reminder will be created
The Settings tab contains parameters that can be configured by the system administrator using preset configurations. These are ready-made templates that can be applied to objects.
Contact the administrator to add the necessary settings to your contract. They will appear on this tab. The settings will be automatically applied to all objects in the contract.
|
In the Settings tab, you define parameters that affect how the device works in the system. For example, here you can configure the trip and parking detector, trip segmentation, and data filtering.
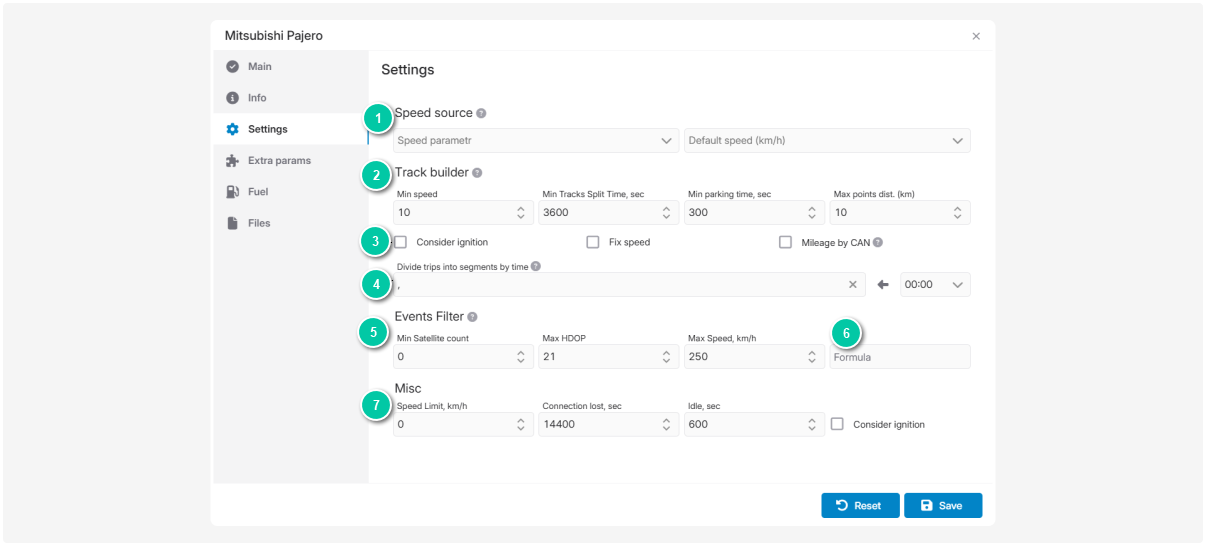
1. Speed source
Select the speed source to ensure accurate vehicle movement data.
By default, the system uses GPS speed, but you can select another parameter if needed, for example, CAN bus speed.
If CAN speed is selected:
If the selected parameter does not contain speed data, the system will automatically switch back to the default GPS speed.
In the Speed source block, you can use the Formula field to convert the parameter value into the correct speed format.
CAN bus speed is not always transmitted in the required unit. For example, it may be received in knots or meters per second. In this case, you can use a formula to convert the technical value into the correct unit for display and calculations in the system.
For example, if speed is received in m/s, use the formula: * 3.6 (This converts meters per second to km/h.)
| ||

|
The Formula field allows you to filter data packets when building tracks.
It works as follows:
The formula returns either TRUE or FALSE for each packet. If the result is TRUE — the packet is excluded. If the result is FALSE — the packet is included in the track.
Examples: =%S%<5 — excludes all packets with speed less than 5 km/h.
=%S%<5 || %S%>200 — excludes packets where speed is below 5 km/h or above 200 km/h.
You can also create more complex formulas using logical operators, brackets, and multiple conditions.
|
Don’t forget to click Save to apply your changes.
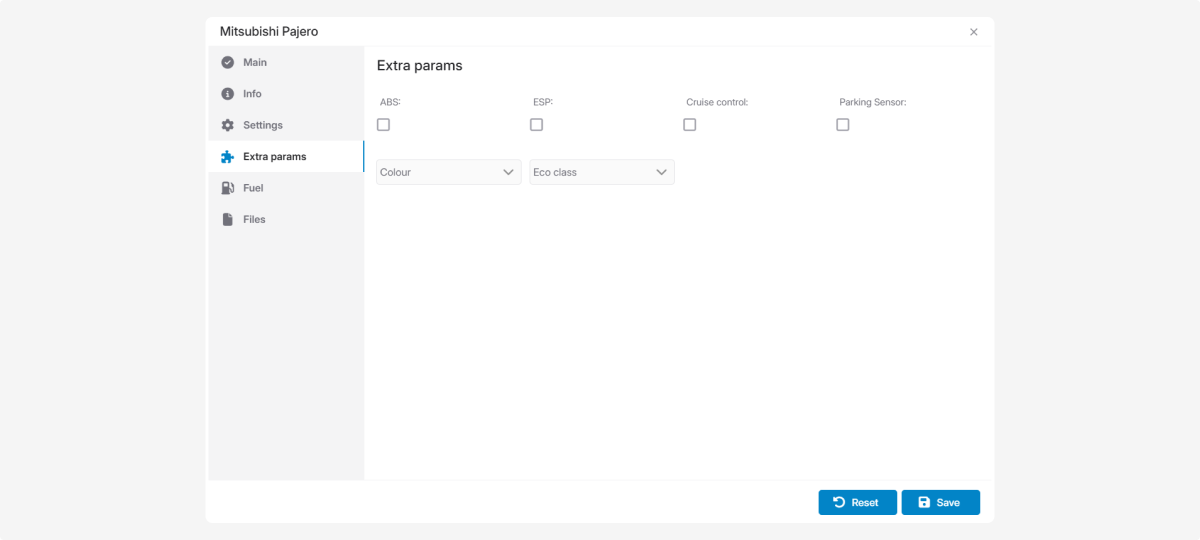
In this tab, you can enter additional information about the object. The exact fields available depend on your contract administrator, who manages them in the Admin panel.
When the administrator configures additional fields, they will appear here. If more fields are needed in the future, the administrator can add them.
Don’t forget to click Save to apply your changes.
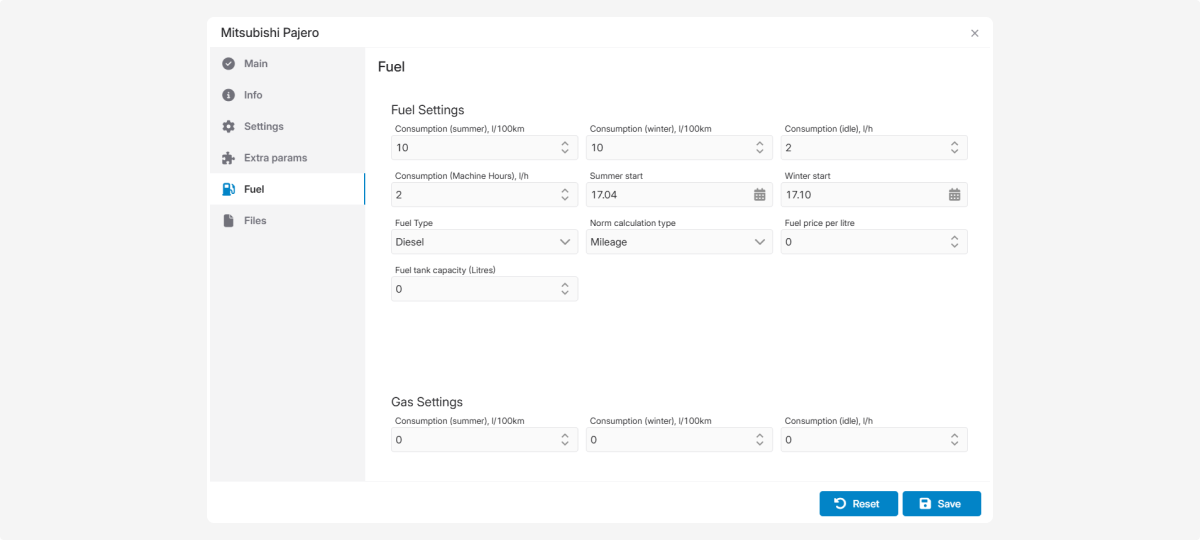
In this tab, you can configure fuel consumption parameters.

-
Summer and winter fuel consumption — specify separately to distinguish seasonal factors from vehicle usage.
-
Start dates — select the start of summer and winter periods via the calendar
 .
. -
Fuel consumption per engine hour — useful for equipment that often works while stationary (construction machinery, agricultural equipment, generators).
-
Idle fuel consumption
-
Fuel type — Diesel, 80, 92, 95, 98, Gas
-
Fuel tank capacity — for tracking consumption and fuel levels.
-
Fuel cost
Don’t forget to click Save to apply your changes.
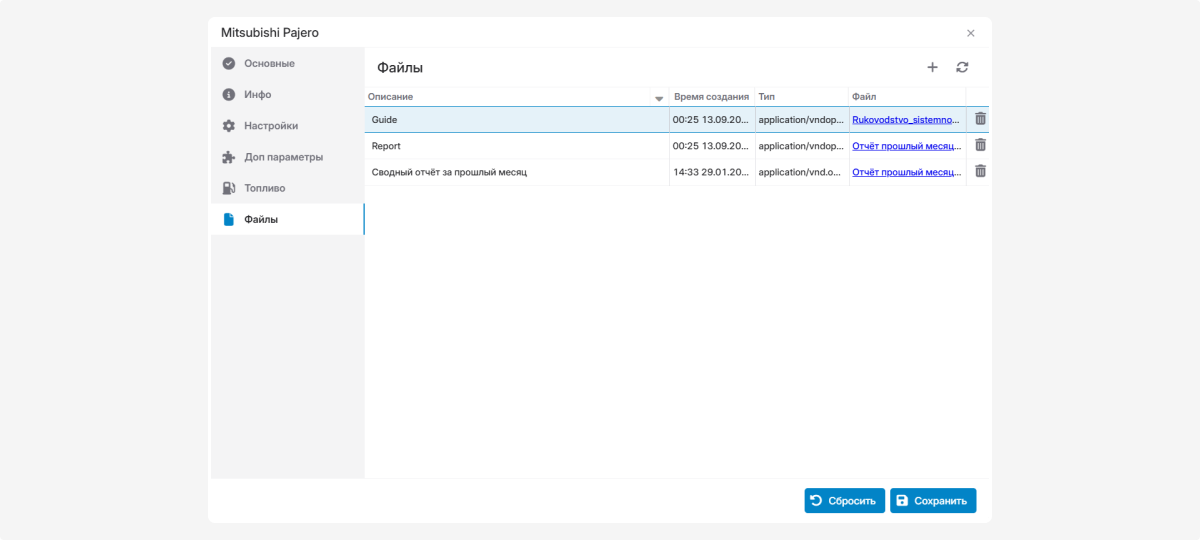
In this tab, you can attach documents and files to an object, keeping all necessary information in one place.
Supported formats: DOC, PNG, TXT, Excel, PDF.
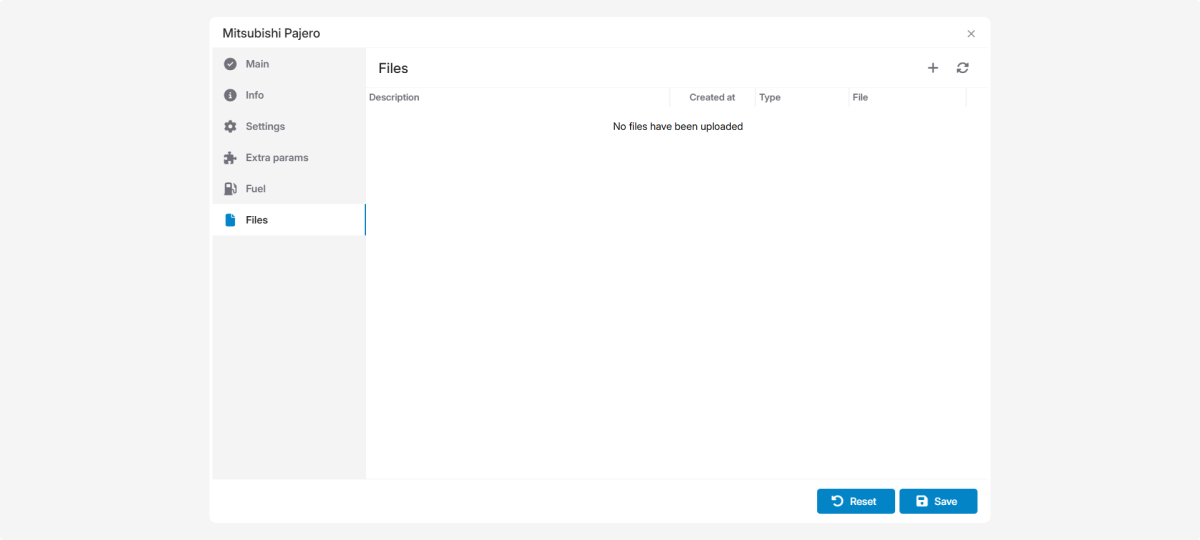
This tab becomes available immediately after creating an object.
How to add a file:
1. In the tab, click Add file 
2. In the pop-up window, enter a description of the file
3. Upload the file from your computer via Select file
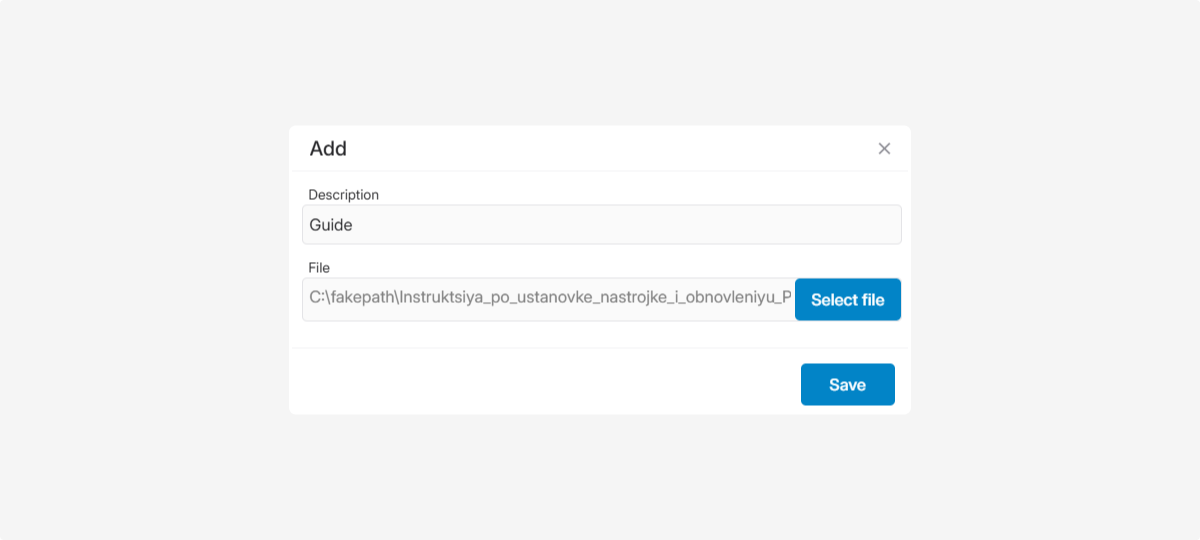
4. Click Save
Uploaded files will appear in this tab.
